Measurement Sensors
Dimension Measurement
Displacement Measurement
Label Quality Inspection Systems
There are many ways to check product and packaging labels for legibility, correctness, and compliance with regulatory requirements. Entry-level label inspection systems are limited to OCR, while advanced systems can identify complex issues like warpage, bubbles or other issues that could compromise a product.
KEYENCE takes pride in providing 1D, 2D, and 3D measurement solutions to inspect for all types of labeling issues.
Get detailed information on our products by downloading our catalog.
View Catalog![Automated Measurement and Inspection Examples [Food and Containers]](/img/asset/AS_138240_L.jpg)

What is Label Quality Inspection?
Label quality inspection is the process of detecting errors or defects in product or packaging labels to ensure labeling meets established quality standards. Label checking is typically carried out in two stages.
- Pre-application checks ensure that the manufacturing date, expiration date, serial number, origin, barcodes, and other printed product-specific data are clear and readable
- Post-labeling inspection helps detect errors with label orientation, wrinkles, rips, air bubbles, prints outside the field of view, and other issues that typically occur post-application
For example, when labeling a bottle, the label inspection is done on the arm of the labeling machine before the label is applied. Checks can also then happen after the label has been applied. Implementing inspection systems during both phases of production is highly beneficial.
Detect Label Defects or Errors and Meet Quality Standards
Detecting errors or defects and meeting established quality standards are the two major reasons for carrying out label quality inspection. Incorrect labeling or misinformation could pose serious health risks to consumers. To protect consumer health and help companies reduce the risks of legal issues, safety and quality standards set by organized regulatory bodies are helpful.
Manual inspection efforts are not suitable for production lines with high-volume productions, hence the need for automated label inspection systems. There are many ways to check labels for correctness, accuracy, legibility, and compliance with safety and quality standards.
Some label and inspection systems employ photoelectric sensor technology, ultraviolet detection systems, and machine vision system inspection.
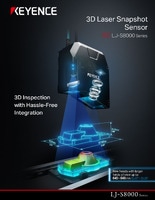
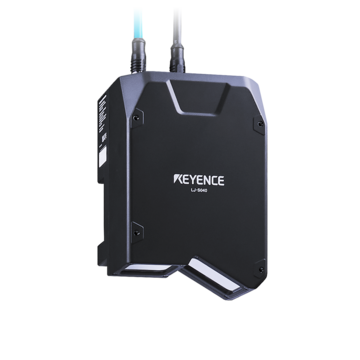
Measurement sensors are another inspection technology that can detect issues related to label positioning, orientation, print quality, size and shape, and presence/absence. A laser profiler, for example, uses a laser beam to capture the 2D/3D profile of a label and then compares the height and width data against established quality presets. This rapid inspection system helps check for misalignment in fast-moving, inline production environments.
Laser profilers are also capable of OCR and can detect issues that regular inspection solutions might struggle with.
We’re here to provide you with more details.
Reach out today!

Key Features of Label Inspection Systems
Some of the key features of label inspection machine systems and technologies are:
High-Resolution Imaging
Label inspection systems use high-resolution cameras or precision laser sensors to capture detailed features of labels.
Advanced Software Algorithms
Technologies that quality check labels utilize powerful processors and software to analyze captured images for error detection and character accuracy checks.
Reject System
More advanced label inspection systems can automatically reject or bypass defective labels and apply the next label in a sequence.
Adaptability
Because no labeling sizing requirement is the same, label inspection solutions must be flexible and adaptable to inspect different types of label materials.
3D Inspection
Many labeling verification technologies may be limited to checks based on characters. On the other hand, advanced systems are able to check for warpages, wrinkles, and bubbling.
Benefits of Using Label Quality Inspection Solutions
In high-volume production lines, rapid inspection is mandatory. Automated label inspection systems can check label quality and verify printed information in real-time while keeping up with production.
Another benefit provided by certain solutions is 3D inspection and measurement. With 3D inspection, these systems can check for air bubbles, rips, wrinkles, and warpages in labeling with high precision. They can also pick up those tiniest dents that take away from the aesthetic appeal of the product or packaging label.
Why Choose Our Sensors for Label Quality Inspection?
KEYENCE takes pride in providing label inspection systems that provide flatness and warpage measurement solutions. Any of these solutions can be employed in production lines to check for and detect bubbles, rips, bumps, and other defects that 1D and 2D-based systems can handle. We have 3D solutions that work on the principle of laser displacement sensors or machine vision.
In label Inspection applications where 1D/2D measurements have limitations, our reliable 3D measurement systems can help create high-resolution 3D profiles. Ready to optimize your label inspection process with KEYENCE advanced inspection solutions? Contact us today for a consultation!
Contact us to learn more about how our advanced technology can help take your business to the next level.
Contact Us
Related Products
Applications
Dimension Measurement
- Thickness and Width Measurement
- Step Height Measurement
- Inner and Outer Diameter Measurement
- Measuring Angles
- Meandering/Edge Measurement
Displacement Measurement
- Positioning and Stroke Length Measurement
- Vibration and Runout Measurement
- Deflection Measurement
- Measuring Eccentricity


