Measurement Sensors
Vibration and Runout Measurement
Vibration and runout measurement are two very important factors associated with rotating machinery in the field of mechanical engineering and mechanical maintenance. Measuring these metrics and subsequently eliminating or minimizing the cause are both essential for ensuring the longevity and proper operations of equipment and rotary machines.
Get detailed information on our products by downloading our catalog.
View Catalog

Vibration Monitoring Sensors
Vibration, at least in the industrial and measurement context, refers to the mechanical oscillations of machines, equipment, and structures. Vibration analysis is an important element of predictive maintenance, as it allows maintenance teams to identify changes in how different machinery operates, indicating wear or impending failure.
Sensors and data acquisition systems are commonly used for vibration measurement and detect different anomalies. These systems help monitor this mechanical phenomenon, increase the life of machinery, maintain product quality, and ensure employee safety.
What is Vibration Measurement?
Vibration is a periodic or cyclic (and thus time-based) displacement of an object around its center static position. If all bodies, when perfectly balanced, produce negligible rotation, any rotation outside the tolerable margins is considered negatively impactful on the longevity and proper operation of rotating machines and equipment.
Measuring vibration is complicated due to numerous factors that contribute to vibration, such as the object’s natural frequencies, the amplitude and frequencies of external elements, and the coupling mechanism between the vibrating energy source and the object of interest. It’s commonly observed in misalignments between motor and pump shafts in industrial settings.
How to Measure Vibration
Vibration measurement relies on detecting cyclical displacement using various tools and methods. It’s a crucial part of mechanical maintenance, as it can be used to predict machinery failure. Some commonly used tools for vibration measurement include vibration measurement sensors and meters, accelerometers, seismometers, and laser Doppler vibrometers.
How Vibration Monitoring Sensors Work
There are many different vibration monitoring systems, each with its own operating principles. KEYENCE manufactures non-contact, high-precision instruments used for measuring many different physical properties (including vibration).
Vibration measurement can be carried out by using vibration monitoring equipment like the LK-G Series displacement sensor, which relies on laser triangulation to measure vibrations. The laser-emitting element fires a beam at the target surface. The light is reflected off the target and detected by the light-sensitive receiving elements.
The sensor detects the position and angle at which the light lands on the light-sensitive element and uses that information to derive the distance between the surface and the sensor. However, the vibration creates variations in the distance between the surface and the sensor, and this variation is evaluated and presented as an oscillation of the target surface.
Other sensor types, such as the SI Series or LS Series, can similarly determine these measurements—they detect the variability in distance or position between the measured surface and the sensor to evaluate target variation and present it as an oscillation or vibration measurement.
Benefits of Vibration Monitoring Devices
The benefits of vibration measurement sensors mostly depend on the context of vibration measurement and monitoring. Vibration measuring and monitoring devices play a critical role in measuring naturally occurring vibrations, such as geological monitoring, structural health monitoring, and environmental studies.
Monitoring geological vibrations is important, as they can provide early warning for natural disasters or provide insight into the structural integrity of bridges, buildings, and dams. This also applies to regulatory compliance and public safety.
In the context of manufacturing, vibration monitoring devices detect early signs of equipment malfunction or failure. This allows predictive maintenance to occur before a major breakdown occurs, resulting in reduced costs, reduced downtime, and the expanded life of machinery and operational equipment.
Additionally, many industries require vibration monitoring equipment and vibration control to protect worker health and safety and minimize environmental impact.
Key Features of Vibration Monitoring Sensors
Vibration monitoring sensors, like laser displacement sensors, are important for applications where physical contact with the measured object could affect the measurement results. Here are a few key features of these vibration measurement sensors.
Non-contact Measurement
The ability to measure vibration without making contact with the object is very important, especially in industries that deal with fragile products. For example, computer hard disk platters are incredibly sensitive, and any physical contact with the surface of the platter could damage it beyond repair.
High Accuracy and Resolution
KEYENCE's laser displacement sensors are incredibly accurate, often in the single-digit µm range.
Fast Response Time
Vibration monitoring equipment operates at high speeds and sampling rates. As such, they provide detailed analysis of the target object and real-time feedback, which is important for applications that require immediate data processing.
Engine Vibration Measurement
Measure many points on an engine with a multi-point laser system for accurate characterization of engine vibration. With ultra-high speed sensors, even the smallest vibrations can be detected.
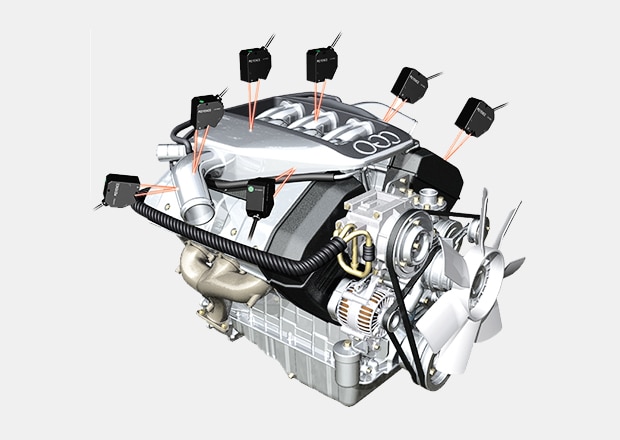

Ultra High-Speed/High-Accuracy Laser Displacement Sensor LK-G5000 series
Flutter Measurement of Belts
Measure the position and edge flutter of a belt with two 2D laser profile sensors for stable measurement.
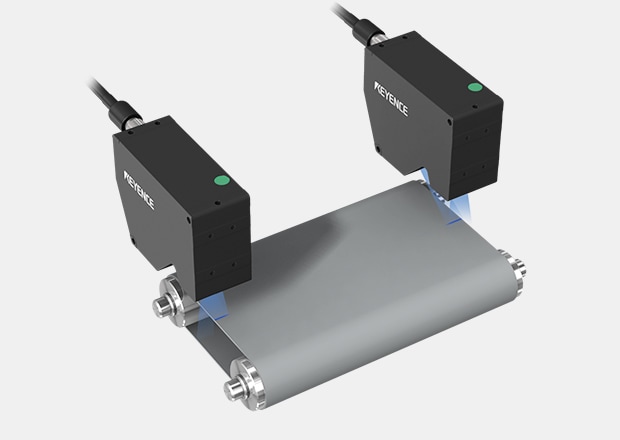

2D/3D Laser Profiler LJ-X8000 series
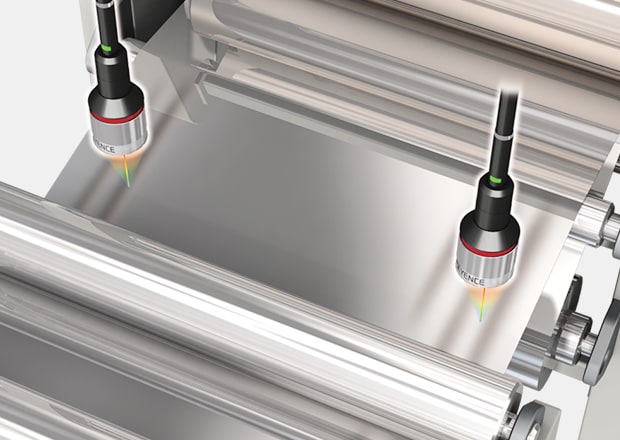
Aluminum Foil Vibration Measurement
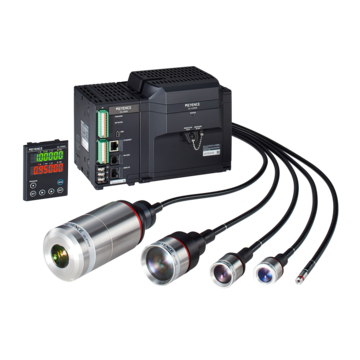
Measure the extent of foil vibration just before slitting. Even if the target is tilted due to vibration, the good angle characteristics of the CL-3000 Series enable stable measurement.
Confocal Displacement Sensor CL-3000 series
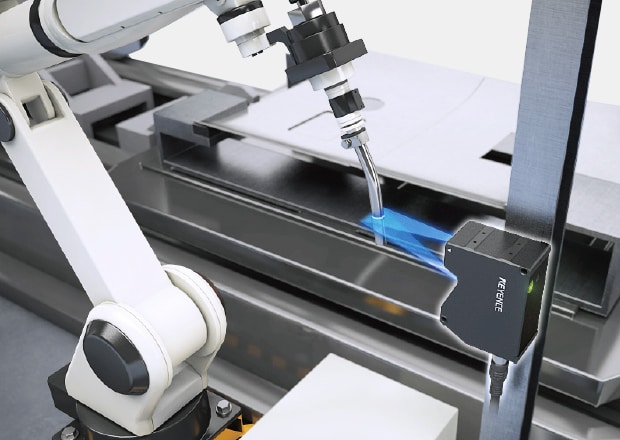
Residual Vibration Measurement of Robots
Residual vibration measurement is used to determine how much a robot shakes after stopping. When working with a welding torch or other tool, the measurement location may not always have a flat surface. Using a 2D laser profiler enables accurate measurement on a wide range of surface shapes.

2D/3D Laser Profiler LJ-X8000 series

Confocal Displacement Sensor CL-3000 series
What is Runout Measurement?
Runout is an inaccuracy associated with rotating mechanical systems, which occurs when the shaft doesn’t rotate exactly in line with the main axis. Interestingly enough, runout is dynamic and can’t be entirely removed. Just like vibration measurement, it can’t be eliminated entirely but can be minimized to acceptable levels.
Runout measurement, on the other hand, serves to assess the deviation of a rotating part from its main axis; all rotating systems suffer from runout, and these inaccuracies may compound or cancel out in a rotary system but never entirely dissipate.
How to Measure Runout
Runout measurements are typically assessed as deviations of a rotating part, which includes both radial and axial runout. Some of the most common radial measurement tools include dial indicators (which are the most commonly used tool for measuring runout), laser alignment systems (which are used for more precise measurements) and CMMs.
Eliminating runout is an important factor in establishing operational stability and longevity of your machines and equipment, as it increases operational efficiency and prevents costly breakdowns and downtime associated with unforeseen maintenance.
What Types of Items Experience Runout?
Runout is a mechanical phenomenon that affects a surprisingly wide variety of items, especially those that involve rotational movement or circular components. It’s commonly observed in mechanical and industrial applications, but it’s also found in everyday objects.
Besides rotating machinery parts, runout can happen in automotive components, computer hard disks, optical and measuring instruments, pumps and compressors, turbine blades, rotors, and even DVDs and CDs.
In each of the aforementioned cases, runout is inefficient and causes wear, noise, vibration, and even operational failure or various safety issues and concerns. It’s therefore important to minimize runout as much as possible.
When selecting a sensor to monitor vibration or deflection, you should consider the accuracy and speed to ensure it's suitable for the amplitude and frequency of your target. You can browse some options below or request a free consultation with a local specialist to get additional recommendations.
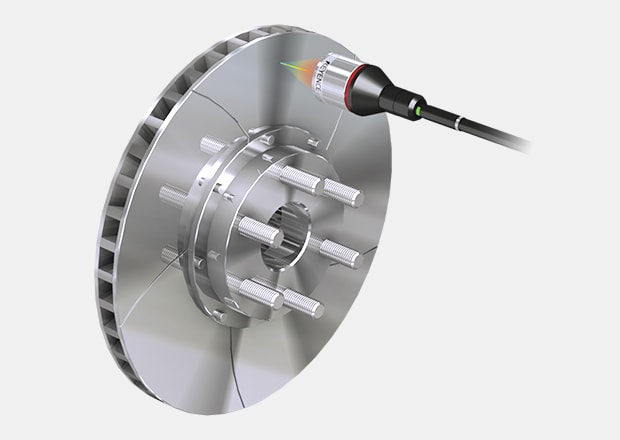
Runout Measurement of Brake Disc
High-speed sensors can measure runout of brake discs, regardless of surface finish.

Confocal Displacement Sensor CL-3000 series
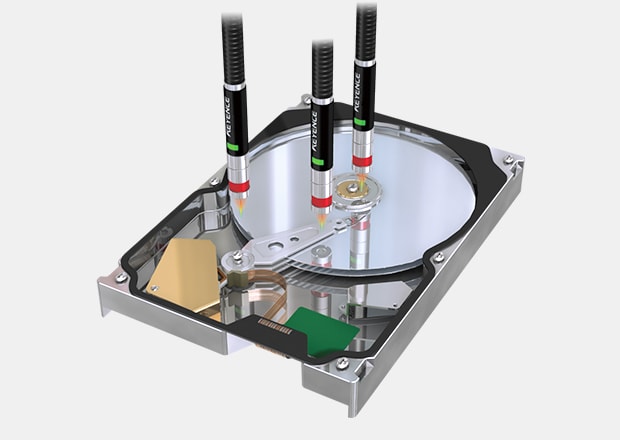
HDD Runout and Height Difference
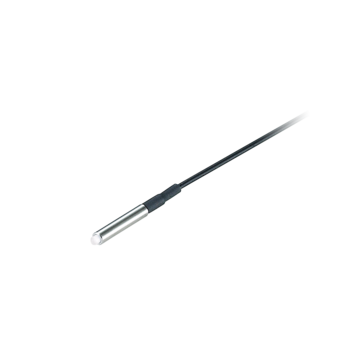
Ultra-compact ø8 mm heads make it possible to install multiple heads in narrow spaces. This reduces the amount of work spent designing equipment and the number of parts that need to be purchased to measure multiple points in close proximity.

Confocal Displacement Sensor CL-3000 series
Micro-head Spectral-interference Laser Displacement Meter SI-F series
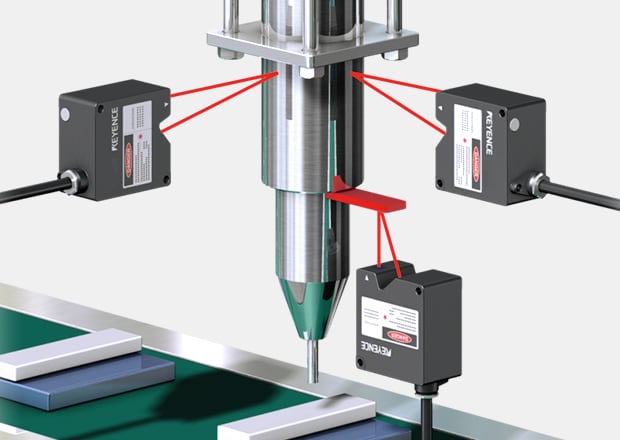
Inspection of Disconnected Electrode Locations
Provide feedback about disconnected locations in electrodes before lamination. Accurately acquire the profile of electrode terminals to perform high-accuracy inspection of edge locations.

Ultra High-Speed/High-Accuracy Laser Displacement Sensor LK-G5000 series

Confocal Displacement Sensor CL-3000 series
Why Choose KEYENCE's Vibration Monitoring Sensors
KEYENCE is the world's leading provider of precision technologies for measuring, quality assurance, and quality control applications—including vibration monitoring. If you're looking to enhance the precision of your vibration monitoring systems, contact KEYENCE and inquire about integrating their equipment with your current manufacturing lineup.
Related Downloads
![Measurement Application Guide [Vibration/Eccentricity Measurement]](/img/asset/AS_55846_L.jpg)
