Measuring True Position
When measuring true position, you are checking the accuracy of the position of the target in relation to the datum (reference plane or line).
Sample Drawings

- a
- Within 0.1 mm dia.
Using a Gauge

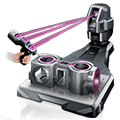
A pass/fail judgment is performed using a measuring gauge or inspection gauge.
It has the benefit of having no variation in operation speed and inspection quality deriving from the skill level of the operator as well as supporting automation thanks to its simple operation.
DISADVANTAGES
Gauges need to be prepared for each target—custom-made gauges have a substantial up-front cost, which makes it difficult to introduce during the prototyping phase.
Using a Coordinate Measuring Machine (CMM)

- a
- X-Y plane, datum plane A
- b
- Z-X plane, datum plane B
- c
- Y-Z plane, datum plane C
- d
- Target
- e
- Surface plate
Set the reference plane and put the stylus on the measurement point on the target. The measurement result is instantly displayed on the screen.
Cartesian coordinates can also be measured, and composite true position can be output with a single measurement.
To measure bores, take several measurements by changing the depth to output verification results of cylindricity, perpendicularity, and straightness.
- Measurement screen
-

- a
- Target point (circle)
- b
- True position measurement result


