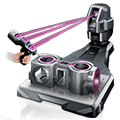
Measuring Coaxiality
When measuring coaxiality, you are checking for any deviation in the central axes (i.e., that the axes of two cylinders are coaxial).
Sample Drawings

Using a Dial Gauge

- a
- Any measurement location
Hold the target in place and put the dial gauge on the vertex of the circumference for which tolerance is indicated.
Rotate the target and measure the maximum and minimum run-out values using the dial gauge.
Repeat measurements on the specified axis. The greatest maximum-minimum difference is used as the coaxiality.
DISADVANTAGES
Factors such as the angle and strength used to put the dial gauge on the target affect the measured value, which implies that measurements may differ depending on the operator.
Because measurements are repeated on the specified axis, the measurements and their results must be checked at all times.
Using a Coordinate Measuring Machine (CMM)

- a
- Surface plate
Put the stylus on the measurement point on the datum element (cylinder), and then put the stylus on the measurement point on the target element (cylinder) to measure the coaxiality. The measurement result is recorded in the measuring machine.
There are two modes of putting the stylus on a surface: point measurement, which measures by putting the stylus on the surface for each measurement; and auto trigger (scanning) measurement, which measures continuous points by moving the stylus while maintaining contact with the surface.
This enables the spiral movement of the stylus to measure cylinders, which are difficult for the stylus to come into contact with.
- Measurement screen
-

- a
- Datum element (cylinder)
- b
- Target element (cylinder)
- c
- Coaxiality measurement result


