Measuring Flatness
When measuring flatness, you are checking for unevenness in the surface, to see how precisely flat a surface is.
The most protruding part and the most concaved part must be at a specific distance between two planes that are separated vertically.
Sample Drawings

Using a Dial Gauge

- a
- Target
- b
- Table
- c
- Dial gauge
Place the target on the precision plane table and secure it in place. Set the dial gauge so that its measuring part comes into contact with the measurement surface.
Move the target so that the measurement surface is evenly measured, and read the dial gauge values.
The largest deviation value is the flatness.
Measurement problems with dial gauges
The measured values may change depending on any changes in the measurement points, since the measurement points change depending on how you move the target. Therefore, it is difficult to obtain stable measured values.
Using a Coordinate Measuring Machine (CMM)

- a
- Target
Put the stylus on four or more points for point measurement of flatness.
Increasing the number of measurement points enables precise, stable measurement even for wide measurement ranges.
Issues and problems with conventional CMMs
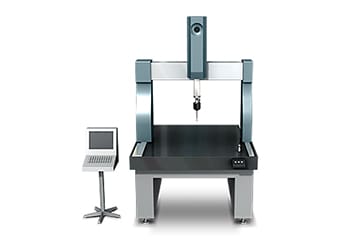
Coordinate measuring machines can measure anything but are not easy to use.
・Difficult to operate
Coordinate measuring machines require specialized knowledge to operate, so they take time to master. And since only a limited number of people can operate them, they cannot always be used immediately when needed.
・Space and Metrology lab required
Coordinate measuring machines are extremely large, so they require a large amount of space for installation. And the room temperature must be kept at 20°C (68°F) at all times, and countermeasures against vibrations are essential. For companies that do not already have a metrology lab, constructing one is not a simple undertaking
A revolutionary CMM that eliminates various problems with conventional devices
Measuring with a dial gauge is difficult, and adopting a 3D measurement system is no easy task...
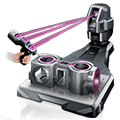
KEYENCE’s XM Series Handheld Probe Coordinate Measuring Machine was created to allow anyone to perform accurate 3D measurements easily.
- ・Easy, accurate measurement for any user
- ・Augmented reality for simplified handheld probe guidance
- ・Easy measurement of even complex three-dimensional shapes
- ・Desktop design that eliminates the need for a large space or metrology lab
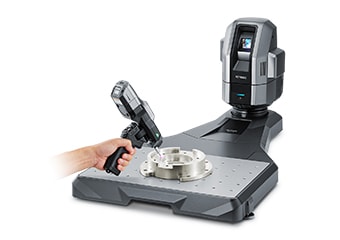
XM Series
- Measurement screen
-

- a
- Flatness measurement result
Easy, accurate measurement for any user
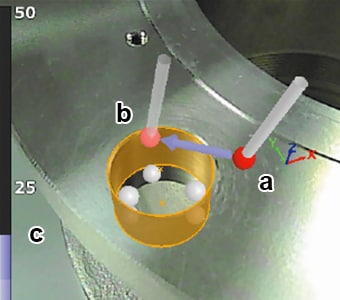
- a
- Current position
Handheld probe tip position display - b
- Measurement point
Flashing indicator of next measurement point - c
- Distance indicator
Distance between measurement point and probe tip
The XM Series’ handheld probe provides a high degree of flexibility, allowing for easy measurement of any target, regardless of shape.
Anyone can measure a feature the same way it was originally measured simply by placing the probe against the location on the part displayed on the screen.
Simply place the probe against the part according to the on-screen guidance on the monitor.
Unlike conventional coordinate measuring machines, the XM Series requires no specialized knowledge.
This allows anyone to perform 3D measurements easily immediately after installation.
Portable, benchtop design with no need for a measuring room
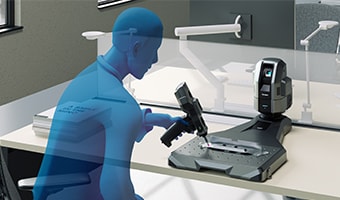
The XM Series’ compact housing and design make it less susceptible to temperature and humidity, allowing for installation anywhere without a measuring room. Installation also doesn’t require any vibration-resistant construction, compressors, or other auxiliary equipment conventionally required when constructing a measuring room. Parallelism is also not required, making it possible to perform measurement simply by placing the machine on a tabletop.
Operating environment: 10 to 35°C 50 to 95°F and 20 to 80% RH
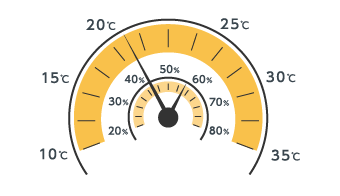
The XM Series utilizes an ultra-robust camera that has been developed to minimize measurement errors caused by temperature changes. This has dramatically improved the flexibility of installation in various environments, reducing the time lost waiting for measurement at worksites and improving work efficiency.
Automatic creation of inspection reports with images for easy comprehension
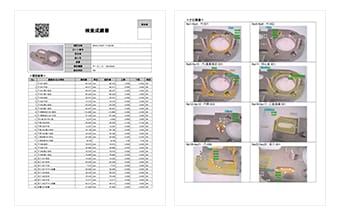
The XM Series comes standard with a function for automatically creating inspection reports and work procedures that include camera images. Measurement points and items are laid out automatically, resulting in significant reductions in inspection report and operating instruction preparation time.

