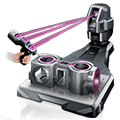
Measuring Roundness
When measuring roundness, you are measuring the roundness of a circular cross-section of a shaft, bore, or circular cone, to see how accurate a circle it is.
Sample Drawings

Using a Micrometer

- a
- Target
- b
- Micrometer measurement terminal
Two-point measurement is performed on the outer form by dividing it into four to eight sections. The roundness is the value obtained by dividing the difference between the maximum and minimum values by 2.
A micrometer is all that is needed for measurement; you can take measurements easily, anywhere.
- Roundness = (Dmax - Dmin) / 2
- Dmax: Maximum value
- Dmin: Minimum value
DISADVANTAGES
There is a limit to the accuracy of the measurement, as the value is an average of two-point measurements. Additionally, an error may occur due to the differences in how the micrometer measurement terminal is placed on the target. To analyze the obtained data, you also need to enter it into a computer.
Using a Coordinate Measuring Machine (CMM)

- a
- Target
- b
- Surface plate
Put the stylus on four or more points for point measurement of roundness.
The measured value is calculated by least-squares method, where the sum of the deviations from all measurement points is the smallest.
- Measurement screen
-

- a
- Roundness measurement result


