CMM (Coordinate Measuring Machine)
In-Process Inspection
Before any product leaves manufacturing and enters the hands of a consumer, it must be inspected. Without inspections, quality control wouldn’t exist and unreliable products would be rampant. Inspections ensure that parts are measured correctly for assembly, that no defects would harm the whole product or consumer, and that products are processed uniformly.
To achieve optimal cost-efficiency and effectiveness, manufacturers rely on in-process inspection. In-process quality inspection involves examining components during the production process rather than waiting until the final stage before distribution.
In-process inspection is a vital part of the manufacturing process that usually requires highly skilled technicians and a diverse toolbox of inspection devices. With the necessity of in-process inspection but the need for extra resources, this process has both benefits and drawbacks.
Read on to learn the ins and outs of in-process inspection, the benefits and drawbacks, and what you can do to have the highest quality in-process inspection.
When Does an In-Process Inspection Take Place?
There are three intervals that the shop floor management team follows to decide to conduct the inspection process in manufacturing: time, quantity, or freely.
- Time interval inspections refer to an in-process quality inspection that happens after a period of time. This could be an interval like every three hours or every two days.
- Quantity-based interval inspections refer to an in-process quality inspection after a certain amount of units are produced. This might entail inspections after every ten parts to meet acceptable quality levels (AQLs) or even all the way up to 100% inspection needs for example.
- Freely-based intervals are inspections based on mere observations or instincts by the team, so they are considered “random.”
We’re here to provide you with more details.
Reach out today!

What Type of In-Process Inspection is Conducted?
When conducting in process inspections, technicians perform two types of inspections: visual and dimensional.
Dimensional inspections are when technicians measure the part to ensure it has the right measurements and dimensions compared to the print or CAD model. The dimensional inspection is integral for parts attached to a larger component further down the supply chain. Without dimensional inspections, a part may not fit correctly into its component.
When dimensional measurements occur, the information can be imported and stored into the machinery for a feedback loop to adjust how the machine processes. It also gives insight into tolerances and how much control the machine has over defects.
A visual in-process inspection is an inspection that checks for marks, indentations, object presence/absence and defects. These visual inspections ensure no damage before the product is put out. Without visual inspections, these defects could lead to a part collecting contaminants or not working correctly.
Contact us to learn more about how our advanced technology can help take your business to the next level.
Contact Us
Benefits of In-Process Inspection
In-process inspection benefits everyone: consumers, manufacturers, and businesses by being cost-effective, ensuring quality control, and preventing bottlenecks – let’s dive into how.
Cost-Effectiveness
In-process inspection is cost-effective because it catches problems immediately before processing costs are wasted. For instance, without in-process inspection, a defect or pattern of defects could make their way to the end of the supply chain. Then, when the part is inspected at assembly, technicians might realize that a component or part must be scrapped because it was manufactured incorrectly or has a detrimental defect.
If manufacturers have to scrap a product at the end of its lifecycle, they waste the cost of assembling, processing, transporting, and inevitably being unable to sell the product.
Quality Control
In-process quality inspection ensures quality control by checking the uniformity of the parts throughout the production process so that the product is in the best form that the consumer and business expect when finalized. For example, inspections on assemblies help ensure that all parts of the assembly fit-up, or fit together, and that their alignment is correct with the necessary holes.
Without inspections, products could have these types of issues or deformities, which range from being a minor inconvenience to a life-threatening defect.
Discover more about this product.
Click here to book your demo.

Drawbacks of In-Process Inspection
Although in-process inspection is necessary for quality control and saving money overall, some drawbacks make the inspection process tedious and costly for manufacturers.
Requires Extra Training
Since the inspection process in manufacturing is held to a high-quality standard, it is coordinated by the management team equipped with extra training and expertise. However, with the shortage of skilled workers after COVID-19 layoffs and manufacturing slowdowns, training for the inspection process in manufacturing is an extra step that can’t always be afforded with budget or time. As a result, not all businesses can conduct these types of inspections.
Using Resources
In-process inspection requires all hands on deck and many measurement devices for different types of products with different sizes, shapes, and materials. For instance, a part made of malleable plastic can’t be inspected with a caliper because that could deform the shape. Or, a large component cannot be measured on the same stage as a small part. Because of this, the correct tools need to be obtained for specific requirements. Sometimes, certain parts require out-of-house inspection, which requires even more resources.
Curious about our pricing?
Click here to find out more.

How KEYENCE’s In-Process Inspection System Solves Conventional Problems
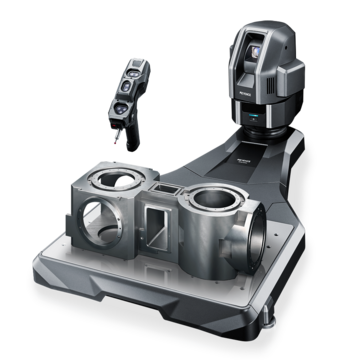
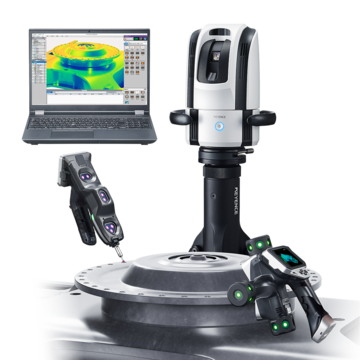
KEYENCE built coordinate measurement machines (CMM) that combat conventional in-process inspection problems. Instead of the tedious, costly inspection system requiring highly skilled workers, KEYENCE simplified it by creating the user-friendly XM and WM Series to ensure quality control and inspection benefits.
Anyone Can Use
As mentioned above, inspections are controlled by a shop floor’s management team and performed by highly skilled technicians. But with the influx of entry-level technicians and shortage of trained skills, KEYENCE’s XM and WM are the solution.
Anyone can use these in-process inspection tools; even untrained technicians can conduct these inspections because of how simple the inspection process is, and the CMM gathers and analyzes the data for the technician. Since any technician can operate these tools, there doesn’t need to be an extra budget for training or slowing down from a lack of trained technicians.
One Device for Many Parts
Depending on size, shape, and material, parts usually need different in-process quality inspection tools. The tooling changes take time, extra cost, and extra knowledge to understand which tool is optimal for which part.
The XM and WM have versatile uses to eliminate tooling changes. The XM inspects up to 2m horizontally and 1m vertically, while the WM inspects up to 25 m horizontally and 12.5 m vertically. The XM and WM can inspect hole distance, circularity, XY coordinates, flatness, perpendicularity, parallelism, angularity, symmetry, distance between curved and virtual lines, and 3D CAD comparison using only one tool.
Discover more about this product.
Click here to book your demo.

Want to Learn More About KEYENCE’s Inspection CMMs?
There is no need to outsource extra technicians or shop floors anymore; KEYENCE’s inspection CMMs don’t require additional training but have the accuracy of a skilled technician. Our CMMs will make your in-process inspection smoother without needing more employees or space. Contact KEYENCE today for a free demo to see how efficient and easy it is to use a CMM for inspections.
Contact us to learn more about how our advanced technology can help take your business to the next level.
Contact Us
Related Downloads
Brochure for the XM-5000 Series Handheld CMM. Portable CMM to easily and accurately measure 3D and GD&T features anywhere including the shop floor and in the machine tool.
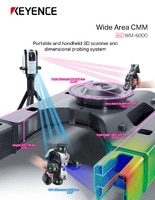
Brochure for the WM Series Wide-Area CMM. A portable setup with a wireless handheld probe that enables users measure large parts and equipment.

![WM Series Measurement / Application Examples [System Versatility Examples]](/img/asset/AS_116820_L.jpg)
