CMM (Coordinate Measuring Machine)
In-Process Inspection Application
At production sites, performing accurate measurements is important for guaranteeing the quality of all products going through the process.
In recent years, the increase in manufacturing of portable electronic devices and transportation equipment has resulted in growing demand for high-precision mechanical processing. Depending on the product, measurements of an order a whole digit higher than conventional methods have become necessary, leading to a need for inspection systems capable of matching these requirements.
For any process, creating products with uniform quality on the basis of predetermined specifications is a necessity. Therefore, it is absolutely necessary to accurately define conditions for measuring instruments within the inspection process and to ensure an environment that enables correct measurements during the operation of the manufacturing line.
What Is In-Process Inspection?
The inspection process in manufacturing is an important function across industries. These inspections happen before, during, and after production to make sure no products meet the consumer with inadequate quality. Inspection that occurs during the machining process is called in-process inspection.
In-process inspection happens in intervals of time, quantity, or randomness. The in-process inspection checklist requires the shop team to visually and dimensionally inspect parts. The visual inspection looks for marks, indentations, and defects. Dimensional inspections ensure a part’s dimensions are within the appropriate tolerance.
We’re here to provide you with more details.
Reach out today!

Benefits of In-Process Inspection
Adjust in Real Time
Although there are other types of inspection, in-process inspection is an inspection that gives you the opportunity to fix your production issues in real time.
If you’re machining a part and doing in-process inspections and find a defective part, you are in the location in which it became defective. You have the opportunity to fix the machine, determine if it was a fluke, or prevent more materials from the same problem. As a result, you will have a larger batch of products that will successfully go through the supply chain, with less scrap.
Cost Effective
Your ability to fix machines and parts in real time will save you time and money in the long run. By immediately removing a defective product as it’s spotted, you prevent your budget and time from being spent on a defective products.
Verifies Quality
In-process inspection confirms that your parts are uniform and meet the quality expectations of your industry, customers, and business.
Ensures Accountability
In-process inspection keeps your team proactive with part errors and gives an accountability plan. By following an in-process inspection procedure based on intervals like time or units, you’re making sure that your team is actively inspecting and reporting it.
Contact us to learn more about how our advanced technology can help take your business to the next level.
Contact Us
Examples of Measuring Instruments Used
- Vernier calipers
- Micrometers
- Dial gauges
- Gauge blocks
- Dedicated jigs
- Coordinate measurement machines
- Image dimension measurement systems
Discover more about this product.
Click here to book your demo.

Key Points for Selecting a Measuring Instrument
- Instruments must be easy to operate in order to enable proper use by on-site operators.
- The longer an inspection takes, the greater the impact will be on the operation of the manufacturing line, which decreases productivity. Therefore, it is important to select a measuring instrument that can perform measurements quickly and accurately.
We’re here to provide you with more details.
Reach out today!

Precautions for Measurements
- Specialized jigs are sometimes created in advance at mass production sites. If these jigs are used for a long time, caution must be taken to prevent errors that may arise from factors such as jig wear and contamination. It is essential to perform periodic inspections and to have management methods put in place.
- Wear gloves when handling gauge blocks. Touching the gauges with bare hands may affect the results due to thermal expansion or contamination. Also, gauge blocks must be allowed adequate time to adjust to room temperature as they do not attain temperature equilibration quickly.
- In-process measurement data is used not only in quality inspections but also as statistical data to clarify variations in measured values and to identify the causes of these variations.
Contact us to learn more about how our advanced technology can help take your business to the next level.
Contact Us
How to Inspect with a Coordinate Measurement Machine
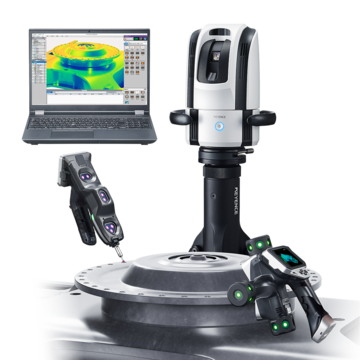
Coordinate measurement machines use probes to collect coordinate points and determine GD&T features and dimensional data. At KEYENCE, we supply handheld and portable coordinate measurement machines that are intuitive and do not require any previous metrology knowledge.
To operate one of KEYENCE’s CMMs—the WM or XM—bring the probe to the part, touch the tip to the desired measurement feature, and press measure. Once you press measure, the CMM will collect the data in seconds and create an inspection report.
If you’re using a CMM for repeated in-process inspection, you can integrate CAD models and trend feedback loops. The system will overlay the CAD model, compare your part to it, show you a color map of the differences, and respond with OK/NG depending on your tolerances.
Get detailed information on our products by downloading our catalog.
View Catalog

How to Inspect with an Image Dimension Measurement System
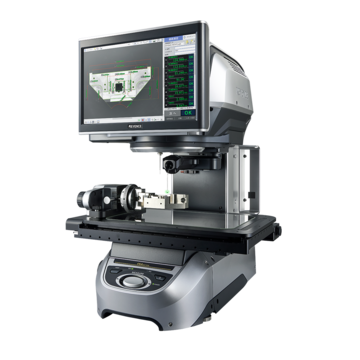
Comparable to an optical comparator, image dimension measurement systems use a stage to collect measurements and dimensions. KEYENCE’s IMs are ideal for small parts, since they’re fully automated, and do not require any previous metrology knowledge.
To use an IM, place up to 100 parts on the stage and then press measure. The IM will autofocus and make any adjustments by itself before collecting hundreds of data points in seconds. Like our CMMs, the IMs make automatic inspection reports and give feedback based on inspection trends.
We’re here to provide you with more details.
Reach out today!

Does Your In-Process Inspection Need Improvement?
Whether your in-process inspection checklist isn’t reaching completion or your in-process inspection procedure is just too slow, tedious, or complex, KEYENCE can help you. Transform your in-process quality inspection into an efficient and accessible procedure that anyone on your shop floor can do by incorporating a CMM or IM.
Inspections don’t have to slow production down anymore, contact us today to learn more.
Contact us to learn more about how our advanced technology can help take your business to the next level.
Contact Us
Related Downloads
Brochure for the XM-5000 Series Handheld CMM. Portable CMM to easily and accurately measure 3D and GD&T features anywhere including the shop floor and in the machine tool.

Brochure for the WM Series Wide-Area CMM. A portable setup with a wireless handheld probe that enables users measure large parts and equipment.

![WM Series Measurement / Application Examples [System Versatility Examples]](/img/asset/AS_116820_L.jpg)
