Measurement Sensors
Dimension Measurement
Displacement Measurement
Selecting a Displacement Sensor and Measuring System
When it comes to displacement sensors and measurement systems, selecting the most appropriate type of device according to the application, required accuracy, and usage environment is necessary. There are a variety of points to consider in determining which device is best for you.
Selection According to Desired Measurement Accuracy
Measurement accuracy varies greatly depending on the measurement system used.
The ideal measurement system will vary depending on the range of measurements sought. For those measurements, it's also necessary to look at the capabilities supported by each measurement system, such as whether the results can be viewed with the naked eye, or if the measurements need to be viewed using software.
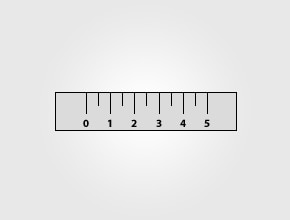
Scale
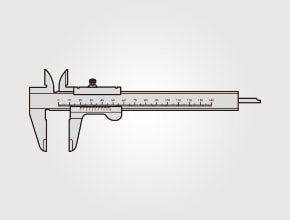
Vernier caliper
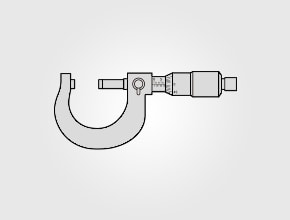
Micrometer

Measuring microscope
| Desired accuracy | Example measurement system |
|---|---|
| 1 mm units | Scale, measuring tape, ruler |
| 0.1 mm units (100 µm units) | Vernier caliper |
| 0.01 mm units (10 µm units) | Micrometer, dial indicator, displacement sensor/measurement system |
| 0.001 mm units (1 µm units) | Displacement sensor / dimension measurement system, measuring microscope, coordinate measurement machine, Electric micrometer |
Scroll
We’re here to provide you with more details.
Reach out today!

Selection According to Target Material and Characteristics
Hard/Soft Targets
For targets made from hard material (such as metal), measurement systems that come into direct contact with the target (such as vernier calipers and micrometers) can be used. On the other hand, targets made from soft material (such as synthetic resins) cannot be measured correctly using measurement systems that come into direct contact with the target. Such targets require non-contact measurement systems that use laser beams.
Opaque/Transparent Targets
If a target is opaque, there are a variety of measurement systems capable of measuring the necessary locations. With transparent targets, however, measurement systems must be selected to match the material of the target. For cured resin material (such as plastics), measurement can be performed easily using a micrometer or other contact-type measurement system. For soft targets such as film, a laser displacement sensor or other non-contact measurement system should be used.
Selection According to Target Shape and Application
When selecting a measurement system according to the application, it's necessary to take into account the shape of the target in order to select the most appropriate device.
Selection According to Number of Devices to Use and Installation Costs
When selecting a device, the number of people that will use it and the degree of frequency those people will use the device at the measurement worksite should also be taken into account. The price and availability of equipment investment should be considered when selecting a measurement system.
Large-scale Measurement System Introduction
Measurement systems frequently used in manufacturing worksites include rulers and vernier calipers. Such devices can be used for measurement at 0.1 mm to 1 mm units and have been adopted by many as personal-use measurement systems.
Measurement Systems Used in Particular Processes
Measurement systems are also used for inspections on manufacturing lines, such as for checking the dimensions of molds. Each target will call for different accuracy requirements, so measurement systems should be selected according to the desired accuracy. Generally, measurement systems with higher accuracy tend to be more expensive. With such devices as 3D measurement machines, improvements or modifications to the installation environment may also be necessary.
Discover more about this product.
Click here to book your demo.

Types of Displacement Sensors
There are several different types of displacement sensors, and choosing the correct one depends on your application. KEYENCE offers a wide range of different displacement sensors, each suited to different applications.
- Capacitive Displacement Sensors
- Non-contact sensors that detect changes in the electromagnetic field they generate as they come into proximity with another object.
- Confocal Laser Displacement Sensors
- These sensors work by focusing a beam of light toward an object, which is then reflected onto the sensor. The intensity of the reflected light determines the distance between the sensor and the object.
- Laser Triangulation Displacement Sensors
- These sensors use triangulation to derive distance and other related measurements. The sensor projects a laser onto the surface, and the laser’s light is reflected back to the sensor. Distance is derived based on the angle of reflected light.
Displacement Sensors vs. Conventional Systems
Conventional systems for measuring displacement are typically very manual and don’t feature the same level of reliability as non-contact, automated methods. Most conventional measurements are conducted by human operators and inspectors using manual tools.
However, the inherent imperfections associated with hand tools and manual measuring techniques — paired with the human susceptibility to errors — further decrease the reliability of conventional systems.
Displacement sensors, on the other hand, aren’t plagued by such shortcomings. KEYENCE’s range of displacement sensors is characterized by high accuracy, very high reliability, and measurement repeatability. This makes them suitable for a wide range of precision applications across various industries.
Curious about our pricing?
Click here to find out more.

Common Displacement Sensor Applications
As stated above, different displacement sensor types are used in a wide variety of applications in numerous industries. They’re near-universally used in quality control in manufacturing, food and beverage industries, electronics, aerospace, and research and development.
However, displacement sensors also fit applications beyond quality control. They can precisely navigate machinery and entire production processes. They’re often used in vehicle testing and design, component and part positioning, the positioning and placement of semiconductor elements in PCB and circuit design, and the measurement of material deformation under loads.
What to Consider When Selecting a Displacement Sensor
Not all sensors are made the same, and where some excel, others aren’t as effective. Thus, selecting the right sensor demands the careful consideration of numerous factors.
One of the most important considerations is the material, the size, and the shape of the object of measurement. Its consistency and shape can significantly affect sensor selection. An ambient environment is also important since both the object and the sensors might be exposed to ambient temperatures, oils, water, dust, and shocks.
Next are the technical aspects of the sensors themselves. Measurement accuracy refers to the sensor’s ability to provide accurate readings that are within tolerances. In most common applications, the accuracy should be 10× higher than the desired tolerances of the inspected part.
Measurement range is also an important factor. For laser displacement sensors, the range refers to the maximum part travel that the sensor can see. For 2D laser profilers, the range also refers to the width of the part.
Interested in learning more about displacement sensors and how they can improve your production processes? Contact KEYENCE today for a consultation and see the difference precise measurement can make in your industry!
Contact us to learn more about how our advanced technology can help take your business to the next level.
Contact Us
Related Products
Applications
Dimension Measurement
- Thickness and Width Measurement
- Step Height Measurement
- Inner and Outer Diameter Measurement
- Measuring Angles
- Meandering/Edge Measurement
Displacement Measurement
- Positioning and Stroke Length Measurement
- Vibration and Runout Measurement
- Deflection Measurement
- Measuring Eccentricity

