Vision Examples in the Electronic Device Industry

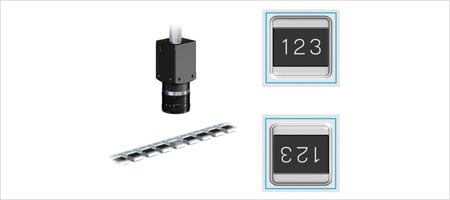
Checking the orientation of chip components
Check the orientation of chip components. Conventionally, the components were checked visually. There were problems with high labor cost for inspection personnel and poor production efficiency. Sometimes oversights occurred due to human errors.
The XG-X/CV-X Series offers a wide selection of lenses and lights. Its unique OCR function allows stable inspection regardless of variations in marking density, character inclination, and character size. High-speed image processing improves production efficiency.
Checking for a lack of solder paste on BGA PCBs
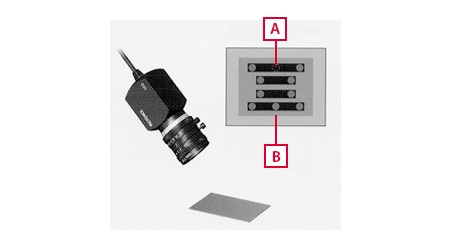
Check for a lack of solder paste (solder cream) applied on BGA PCBs. Machine vision has conventionally been used for checking the presence of solder paste, but it was difficult to judge the amount of solder paste accurately.
The XG-X/CV-X Series can not only check for the presence of solder paste, but also measure the amount of paste based on the area. This enables judgment of whether the amount is appropriate or not. Early finding of bond failure of BGA PCBs caused by insufficient paste prevents defective workpieces from being manufactured in large volume.
Lack of paste
PCB
Print intensity inspection for electrolytic capacitors
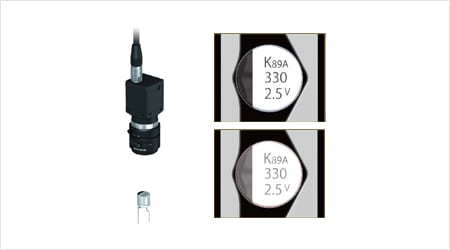
Inspect the strength of the marking on the top surface of electrolytic capacitors. Although conventional machine vision could recognize marked characters, they could not differentiate subtle differences such as strength or fading.
The XG-X/CV-X Series offers a high-speed, high-accuracy profile search function, PatternTrax, to correct the position and tilt of the characters and reliably check the marking strength of the characters with the density inspection mode.
Counting the number of components on conveyor trays
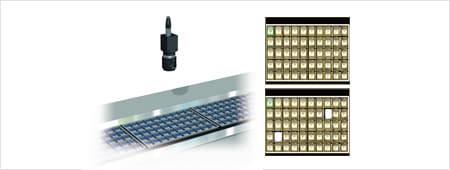
Count the number of SD cards placed on a transfer tray. Conventionally, two or more monochrome cameras were used because they had a small number of pixels. Consequently, changeover took a long time.
The XG-X/CV-X Series supports a lineup of high-pixel cameras including a 21 megapixel model to allow a single camera to count targets over large areas. The high-speed, high-accuracy profile search function, PatternTrax, can detect many SD cards instantaneously to ensure reliable counting inspection. Using a color camera enables simultaneous inspections such as identification of different types and orientation, improving production efficiency.
Counting tiny chips and checking for defective marking
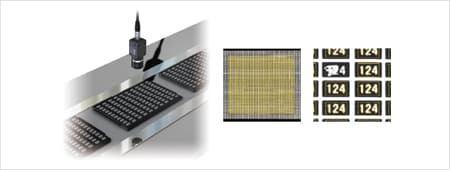
Count the number of tiny chips and check them for defective marking. With conventional machine vision, the field of view of a single inspection was small. The inspection had to be repeated several times, which was time-consuming.
The XG-X/CV-X Series supports high-pixel cameras with 21 megapixels that increase pixel resolution so that you can complete the inspection by capturing just one image. The high-accuracy profile search function, PatternTrax, allows multiple search attempts, up to 2000 times, so you can search for and count many chips at once even over large areas.
Inspecting wire bonding
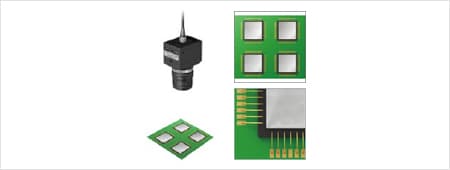
Check for broken or misaligned wires after wire bonding. Conventional low-pixel machine vision could not check for minute misalignment or detached wires.
The XG-X/CV-X Series allows the selection of a high-pixel camera with 21 megapixels. It enables high-accuracy appearance inspection for misalignment of wire bonding, and detached or broken wires.
Recognizing part numbers
Recognize characters marked on electronic components. Detection using conventional machine vision was sometimes unstable due to variations in character shapes or changes in the contrast between the characters and background. It was also difficult to identify which parameters should be adjusted in these cases, resulting in a lot of labor spent trying to solve the problem.
The XG-X/CV-X Series offers the sub-pattern registration function to allow registration of several patterns representing the variations of a character. This allows stable recognition. Since the progress of character extraction can be checked as a waveform during operation, adjustments can be made visually and smoothly.
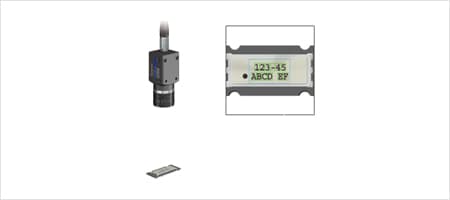
Identifying bad marks and laser marked characters
Identify bad marks and characters marked with a laser marker. Conventional machine vision could not identify bad marks and marked characters simultaneously, resulting in the need for visual inspection.
The XG-X/CV-X Series uses image processing to emphasize subtle differences between bad marks and characters to enable inspection. Using a color camera allows the judgment of color differences.
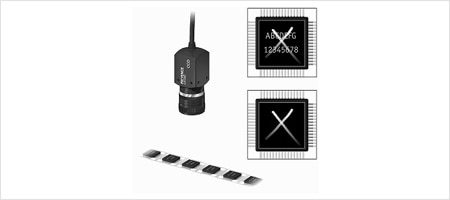
Inspecting transistor marking
Inspect the characters marked on transistors. The processing speed of conventional machine vision was so slow that the line speed had to be adjusted to the inspection speed.
The XG-X/CV-X Series is capable of high-speed processing so it can perform inline inspection of the characters marked on transistors. A single machine vision enables inspections of not only marked characters, but also appearance and presence, improving production efficiency.
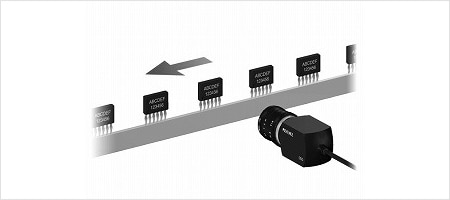
Checking misaligned workpieces before molding
Confirm the position of the workpiece in a mold. Conventionally, the positions of workpieces were confirmed visually. The position varied depending on the worker.
Using machine vision to monitor the inside of a mold enables accurate judgment of the proper position of the workpiece. Misaligned workpieces may lead to severe damage including mold breakage or production shutdown. The machine vision system can prevent these problems.
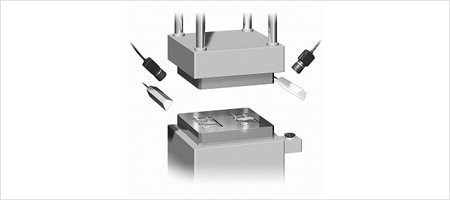
Measuring pitch and coplanarity simultaneously
Inspect pitch and coplanarity at the same time. Conventionally, pitch and coplanarity were inspected separately. The configuration and setup had to be done separately, wasting a lot of labor.
The XG-X/CV-X Series can control up to four cameras with a single controller, which reduces the labor for inspections significantly. Since pitch and coplanarity can be accurately measured with a single station, the costs for inspection can also be reduced.
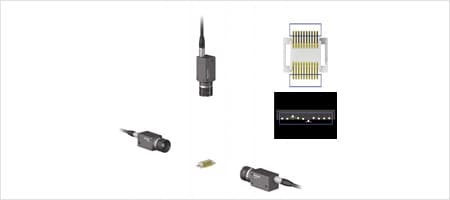
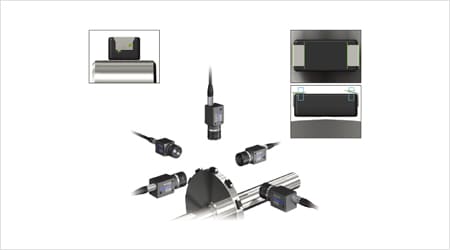
Performing multi-angle inspection of electronic components
Check for surface defects and lifted terminals of electronic components. Appearance inspection was generally performed with monochrome cameras. The inspection could not recognize defects such as irregularities on the molds or terminal surfaces, which caused malfunctions.
The Color to Gray processing of the XG-X/CV-X Series can recognize sufficient differences in shading between defects and the background. This reduces malfunctions and greatly improves inspection yield rate. In addition to the unique edge detection principle, the system offers the Profile Position function that automatically scans within the range and calculates the maximum and minimum values of the edge data of all points. This allows recognition of the precise status of the terminals.
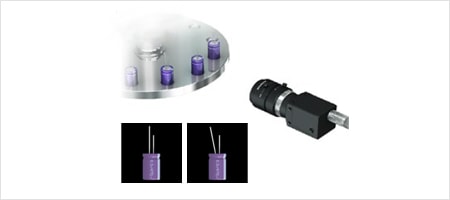
Inspecting capacitors for defective leads
Check the appearance, lead dimensions, and bending of leads of electrolytic capacitors. Conventionally, basic edge inspection tools were used to check partial dimensions only.
The Profile Position inspection tool of the XG-X/CV-X Series uses a single inspection window to obtain edge position information of multiple points and achieves more detailed dimension inspection. The combination of the Line processing mode and Angle measurement allows angle inspection of the leads of electrolytic capacitors. The high-speed processing enables 100% inspection with high accuracy.
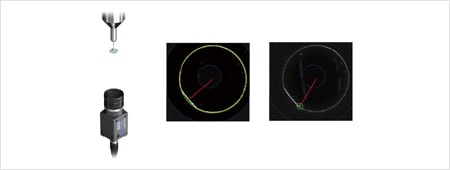
Measuring the rotation angle of D-cut lenses for smartphones
Measure the rotation position of D-cut lenses for smartphone cameras. The position of the minimum radius was detected with the trend edge position mode of conventional machine vision. Sometimes the edge detection failed due to dust or other sources of noise.
The Profile Defect stain mode of the XG-X/CV-X Series can stably detect just the D-cut portion of the lens without being affected by subtle changes. The Profile Defect stain mode can be set to find a concave portion of a specified length or longer.
Inspecting ICs
Perform various inspections of ICs for bent leads or pin pitches. Dedicated inspection machines were used, but it was necessary to prepare different machines depending on the inspection item and product type, which was expensive and required a lot of labor.
The high-accuracy XG-X/CV-X Series can quickly complete multiple inspections which used to be possible only with dedicated machines, such as measurement of IC lead center pitches, detection of bent or missing leads, marking inspection, and orientation checking.
Welding position defect inspection for battery tab terminals
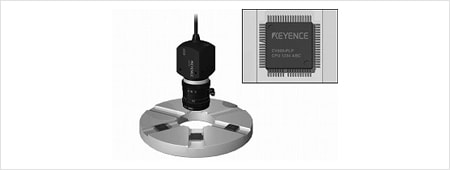
Check the position of battery tab terminals. The recognition was difficult with conventional machine vision, as it was impossible to accurately check for improperly welded battery tab terminals.
With the XG-X/CV-X Series, the welded points can be detected as black lumps with the Blob tool and then the distances between the center of gravity coordinates can be detected with the Dimensions/Geometry tool. This achieves reliable 100% inspection with an inspection time of tens of microseconds per battery.
Inspecting switch button assembly position
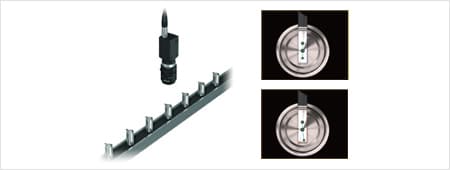
Check the position at which a switch button was assembled. Conventional machine vision could not accurately detect the profile of the portion with low contrast.
The XG-X/CV-X Series can measure the distance between the center of the hole in the switch body and the center position coordinates of the button with the Dimensions/Geometry tool. The high-accuracy profile search function, PatternTrax, allows reliable detection of the profile of the target portion with low contrast to ensure stable position inspection.
Detecting burns or short circuits of connector resin housings
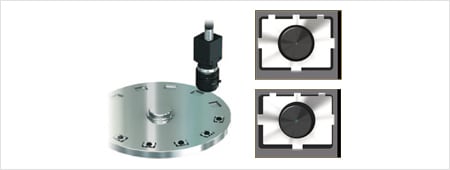
Detect defects of the resin housing, such as burns, stains, or short circuits. Conventional machine vision could not recognize subtle changes.
The stain inspection mode of the XG-X/CV-X Series allows easy and reliable detection of defects of the resin housing such as burns, stains, or short circuits.
Inspecting the appearance of chip capacitors
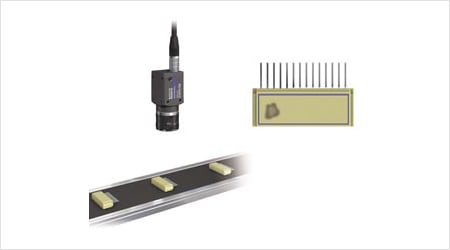
Detect flaws, stains, or cracks on capacitor surfaces. Conventionally, defects were inspected individually and visual inspection was performed in the final step. The inspection required a tremendous amount of labor.
The introduction of machine vision enables stable appearance inspection for flaws or stains. Using the Profile Position tool of the XG-X/CV-X Series allows both appearance inspection and width measurement to be carried out simultaneously.
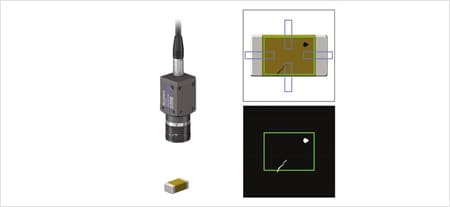
Inspecting the appearance of battery housings
Check the appearance of battery housings. Machine vision have been used for the detection based on shading change information, but sometimes detection fails due to the influence of irregularities caused by glossy metal surfaces.
The XG-X/CV-X Series offers an image enhance filter function, Shading correction, to cancel uneven brightness on the housing surface and allow stable detection of only dents and flaws as defects.
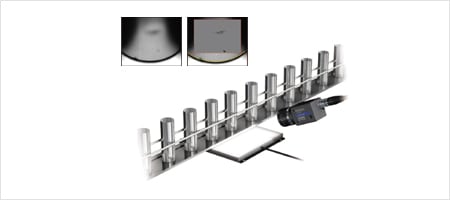
Image sensor appearance inspection
Detect the defects on CCD surfaces such as flaws or stains. Conventional machine vision could not recognize defects such as flaws or stains.
With the XG-X/CV-X Series, the combination of the stain inspection mode and the Shading correction filter achieves reliable detection of defects by ignoring the contrast variation on the CCD surface.
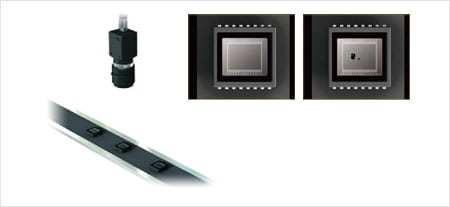
Inspecting the appearance of LED parts
Detect defects on the surfaces of LED devices by using the stain inspection mode. Conventional machine vision could not recognize subtle color irregularities, which led to the outflow of defective products.
The XG-X/CV-X Series can smooth out individual color irregularities with the Shading correction filter to detect only defects stably and reliably in all products.
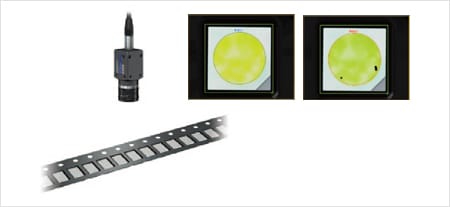
Inspecting LCD backlights for foreign particles
Check the appearance of LCD backlights. Conventionally, visual inspection was performed and dedicated inspection personnel were assigned to respective lines. However, the judgment criteria varied depending on the personnel and sometimes defective products were overlooked.
With the XG-X/CV-X Series, the high-resolution camera with 21 megapixels and high-accuracy image processing enable inspection without overlooking subtle defects. This can prevent the outflow of defective products.
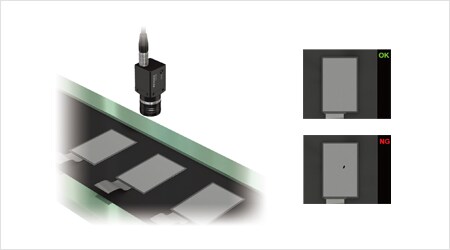
Inspecting electronic components for defective molding
Inspect IC resin molds for defective shapes. Conventional machine vision could not detect subtle defects in molding, resulting in the outflow of defective products.
With the XG-X/CV-X Series, the high-resolution camera with 21 megapixels and high-accuracy image processing enable inspection without overlooking subtle defects, which can prevent the outflow of defective products.
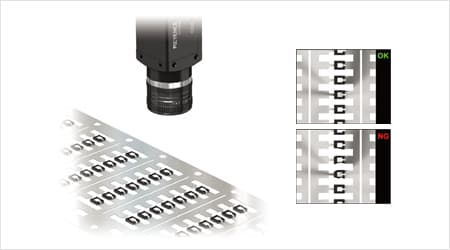
Inspecting resistor color code
Judge the color codes of resistors. Conventional monochrome cameras were incapable of color judgment so inspection of color codes was difficult.
The XG-X/CV-X Series supports color cameras and can judge multiple colors simultaneously through the use of its unique color processing. This allows the automation and speed-up of inspection of targets such as resistor color codes.
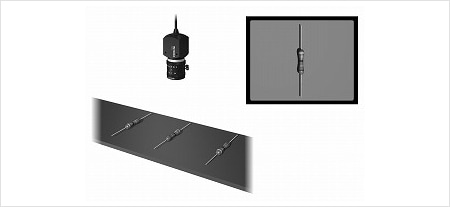
Inspecting ceramic chips
Check the appearance of ceramic chips. Conventional machine vision could not accurately check the appearance when the target was misaligned.
The XG-X/CV-X Series allows accurate inspection of ceramic chips through position correction based on the pilot holes in embossed tape. It is also possible to perform inspection of multiple points simultaneously or to compare each image with an image of an OK product, which ensures reliable inspection.
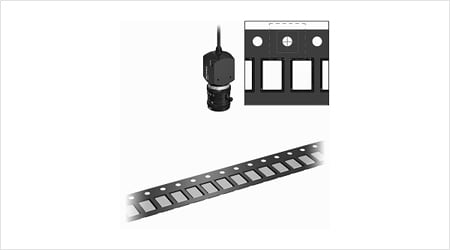
Detecting defective paste on lead frames
Judge defective paste application or soldering on lead frames. With conventional methods, the judgment of paste or solder was unstable on copper frames.
The XG-X/CV-X Series supports color cameras to ensure reliable color differentiation between copper and solder.
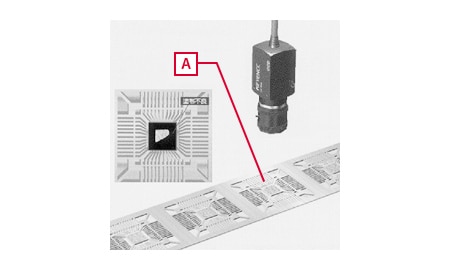
Insufficient paste
Measuring the curvature of lead wires
Measure the amount of curvature of lead wires. It was extremely difficult to measure the maximum amount of curvature or to identify its location because the location was unpredictable.
With the XG-X/CV-X Series, the maximum value can be determined easily through the scanning of lead wires.
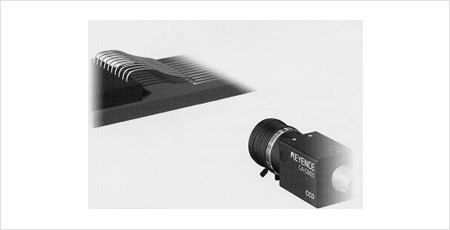
Inspecting for plating defects of terminals
Detect defective plating on terminal pins. Conventional monochrome cameras could not differentiate colors so it was impossible to detect differences showing the presence of plating or defective plating.
The XG-X/CV-X Series supports a lineup of color cameras and offers unique color processing to ensure reliable differentiation between silver and gold that was difficult with monochrome cameras.
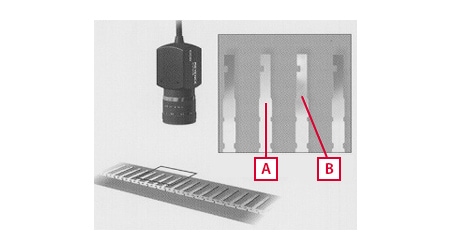
omission
unevenness
Inspecting embossed tape for crushed pockets
Check the appearance of embossed tape pockets. Conventional machine vision could not check for crushed pockets because they could not recognize unevenness.
With the XG-X/CV-X Series, applying a coaxial light from above emphasizes the crushed sections only to enable recognition. Even subtle crushing can be emphasized clearly.
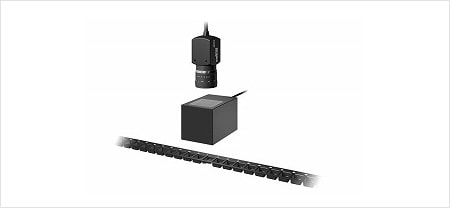
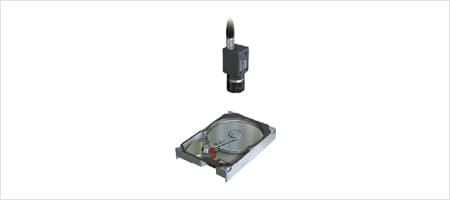
Inspecting position and appearance of HDD components
Check the rotation position and appearance of HDD components. Conventional search based on the normalized correlation method was sometimes affected by the glare on the background.
PatternTrax, the high-speed, high-accuracy profile search of the XG-X/CV-X Series, ensures stable position inspection without being affected by the same lack of featured points.



![A Technical History of Image Processing Vol.1 [Camera]](/img/asset/AS_46814_L.jpg)
![The Latest Image Processing Applications [Transportation Industry]](/img/asset/AS_71759_L.jpg)

![The Latest Machine Vision Inspections [Food and Medical Industries]](/img/asset/AS_72814_L.jpg)

