Optical Comparator (Profile Projector)
How to Choose an Optical Measurement Device
An optical measurement device is a measuring instrument that uses optics like illumination, a lens, and a mirror to create an image that is measured. These devices can measure dimensions such as a part’s length, width, radius, etc. Because of their impressive capabilities, optical measurement devices and related tools have grown in popularity and are used across a range of industries.
In this blog, we’ll analyze the differences between optical measurement system processes and optical measurement machines. In addition, we will discuss which of KEYENCE’s optical measurement instruments will work best for your production needs. To do determine which system is best, we will look at several important factors including part size, part volume, accuracy and more.
Manual vs Automated Optical Measurement Devices
There are two categories of optical measurement devices: manual and automated. KEYENCE provides software-based optical measurement instruments. However, it is important to acknowledge manual devices and their history to understand how we got here today.
Manual
Manual optical measurement instruments have been used as the standard dating back to the 1920s. These devices are commonly known as optical comparators. Optical comparators use illumination, lenses, and mirrors to project a magnified shadow or silhouette of a part for measurement.
The shadow is then manually analyzed for defects and/or measured by a metrologist or quality control technician. The common processes that technicians use are either silhouette measurement or point comparison. These processes are tedious, subject to error, and require detailed metrology expertise.
Automated
A software-operated optical measurement machine is the newest version of optical measurement equipment and the type of device that KEYENCE manufactures. It is known as the fastest and most accurate because of the automation and elimination of human error.
The process is exponentially shorter than manually measuring because it often only requires the push of a button. Once the measuring button is pushed, a software-based optical measurement machine will analyze a part and immediately report all measurement dimensions.
We’re here to provide you with more details.
Reach out today!

Factors to Consider When Choosing Optical Measuring Devices
With a number of optical measurement options available, choosing the right one can be challenging. Your industry, type and size of parts and components being measured, speed, and other similar details will contribute to a decision. By understanding and breaking down the important factors to consider, we can help you narrow down your choices.
Field of View and Working Distance
When choosing an optical measuring device, consider the size and shape of the objects you'll measure. How big are the objects? How close can you get to them? The working distance is the distance between the device and the object. You need a device with a field of view that lets you see the whole object and a working distance that allows you to use it comfortably. For example, if needed, an optical comparator can help you measure the X and Y axes simultaneously.
Magnification and Optical Resolution
Magnification lets you zoom in for a closer look, like a built-in microscope. Resolution, on the other hand, is like having super sharp vision, allowing you to see the finest details. Higher magnification and optical resolution are necessary for measuring small features accurately. Machines like the LM Series or Optical CMMs, have a 3x greater resolution than conventional imaging sensors.
Accuracy and Precision
Accuracy and precision are essential for reliable measurements, but these can vary with optical measurement equipment. Accuracy refers to how close a measurement is to the true or accepted value. Precision refers to how close measurements of the same item are to each other. You need a device that's both precise and accurate. Look for optical measuring devices, like a multisensor measurement system, with the right degree of accuracy and precision to fit your applications.
Compatibility with Existing Systems
Does your new device play well with others? Consider whether the optical measuring device is compatible with your existing systems and software. If you already use specific software or other measuring tools, ensure your new device can integrate seamlessly. By doing so, you can streamline your workflow and save time. For instance, if you're already using CAD software or other measurement tools, having a device that can sync with these systems will make your job much easier.
Cost Considerations
Cost is always a factor when looking at optical measurement options. Consider the initial purchase price as well as any ongoing maintenance and operating costs. While it is essential to stay within budget, remember that investing in a high-quality optical measuring device can lead to long-term cost savings. How? This equipment can immediately impact your operations' efficiency while saving valuable time.
By considering these factors, you'll be well on your way to choosing the perfect optical measurement system for your needs.
Discover more about this product.
Click here to book your demo.

KEYENCE’s Optical Measurement Devices
When considering KEYENCE’s different optical measurement instruments, it’s helpful to consider your priorities and the parts you’re working with. Do you have big or small parts? Do you require maximum accuracy for strict regulations? How experienced with metrology are your technicians? What does your shop floor look like? Let’s dive into the different types for your consideration.
IM-8000 Series - Image Dimension Measurement System
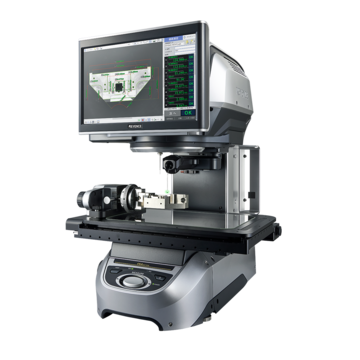
The IM Series is known as an upgraded version of a classic optical comparator. It is a compact unit with an 12x8x3 (X,Y,Z) inch measurement range. This makes it optimal for smaller part measurements. But that doesn’t mean it doesn’t have big capabilities—the IM Series can measure up to 300 dimensions on up to 100 parts at once.
The IM follows a “place and press” process that only requires you to place parts on the stage and press a button. Once the button is pushed, the system will instantaneously measure, create an inspection report, and produce statistical analysis. Hardly any metrology expertise is required with this easy tool.
Some part applications of the IM include:
- Lathe process parts
- Screw and bolts
- Pressed parts
- Springs
- Injection mold parts
- Transparent parts
The IM Series can also run inspections, including:
- Prototypes/first-off tool part inspections
- CAD creation and comparison of samples and parts
- Pre-shipment inspections
- Incoming inspections
Choosing the IM Series optical measurement system is ideal for anyone wanting a user-friendly and accurate machine for measuring or inspecting small parts.
LM Series - High Accuracy Image Dimension Measurement System
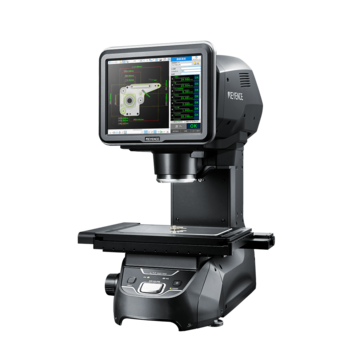
The LM Series is the most accurate optical measuring machine that KEYENCE’s Quality and Metrology Systems group has. Because of this, it is recommended for industries with strict regulations, like the medical device industry. The latest LM-X Series is a multisensor measurement device that can detect and measure up to 5,000 dimensions on up to 1,000 parts at the same time. With its highly magnified camera, autofocus, and strong lighting conditions, the LM is capable of analyzing items less than the width of a human hair!
The LM Series also has non-contact Z-height measurement capabilities, making it ideal to measure parts that can deform with pressure, like silicon or thin plastic parts.
Some applications of the LM Series include:
- Clear checks of surface edge cuts
- Edge detection for resin-molded parts
- Precision metal parts (end faces and hole pitches)
- Teeth and overall dimensions of a connector
The LM Series is user-friendly, requiring only two steps—placing parts down and pressing a button—so it’s ideal for productions that require a straightforward and highly accurate optical measurement system.
Get detailed information on our products by downloading our catalog.
View Catalog

Ready to Request a Demo?
Want to learn more about KEYENCE’s optical measurement machines? Demos help you understand how our products work with your needs. Request a demo today, and our team will contact you immediately to set up a demo of any optical measuring machine you are interested in!
Discover more about this product.
Click here to book your demo.

Related Downloads
We asked our customers why they switched from conventional technologies to the IM Series Instant Measurement System. See how this system adds value to any inspection process.
See common optical comparator application examples measured on the IM Series Instant Measurement System. Application examples include: turned parts, machined parts, springs, stampings, fasteners, gaskets, etc.
![IM Series Q&A: Frequently Asked Questions [Summary]](/img/asset/AS_124476_L.jpg)
FAQ about the IM Series next-generation optical comparator and how it compared to conventional technology including vernier calipers, micrometers, and optical comparators.

