Surface defects that impair welding quality
In principle, welding processes have to join materials in accordance with drawings based on appropriate welding design. In addition, it is essential to ensure welding quality, including weld appearance and strength. This page introduces typical surface defects that impair welding quality.
- Pits
- Undercut
- Overlap
- Insufficient reinforcement
- Surface cracking
- Arc strike
- Bead meandering (bent/misaligned bead)
- Remaining groove
Pits
Pits (open defects) are surface defects produced when gas cavities formed inside the weld metal solidify after the gas escapes from the bead surface. Gas cavities remaining inside the bead are an internal defect known as blow holes. The causes of these defects include the use of improper shielding gas; insufficient deoxidizer; oil, rust, plating or other matter adhering to the surface of the groove in the base material; and moisture contained in the material.

- Pits
- Blow hole
Undercut
Undercut is a groove at the weld toe produced by the base material exiting weld. Typical causes are excessively high welding current or welding speed. Too much weaving width may also be the cause of undercut.
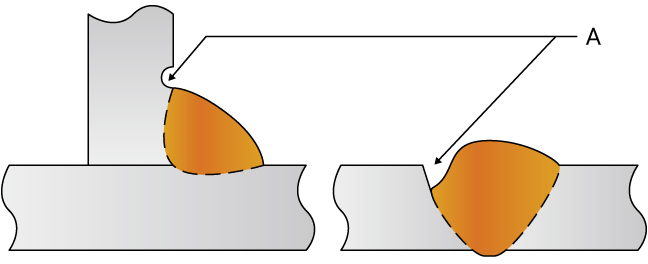
- Undercut
Overlap
Overlap occurs when molten metal flows over the surface of the base material and then cools without fusing with the base material. A typical cause of overlap is the supply of too much weld metal due to low welding speed. Overlap in fillet welds is caused by the droop of excessive molten metal due to gravity. The necessary countermeasure is to review the welding conditions (such as setting higher welding speed or lower welding current).
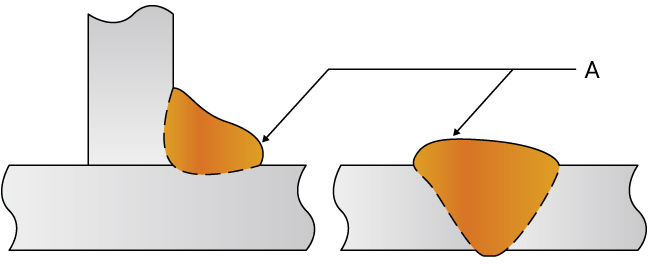
- Overlap
Insufficient reinforcement
Reinforcement is the weld metal built up above the surface in excess of the required dimension in the groove weld or fillet weld. A typical cause is fast welding speed (moving speed of the heat source) that makes the deposition of the weld metal in the groove insufficient.

- Insufficient reinforcement
Surface cracking
Surface cracking forms cracks in the surface of hot welds immediately after welding. It is broadly divided into solidification cracking and liquefaction cracking. Solidification cracking occurs when the weld is solidifying. Liquefaction cracking occurs in multi-layer welding when the previous welding layer is melted by subsequent welding. Another classification refers to the generated position and shape of the crack, such as longitudinal cracking, toe cracking, transverse cracking, crater cracking, and so on.
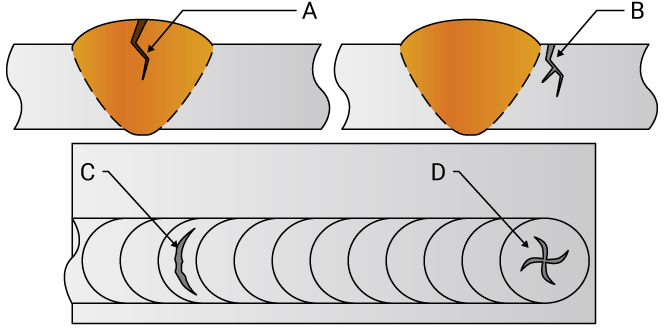
- Longitudinal cracking
- Toe cracking
- Transverse cracking
- Crater cracking
Arc strike
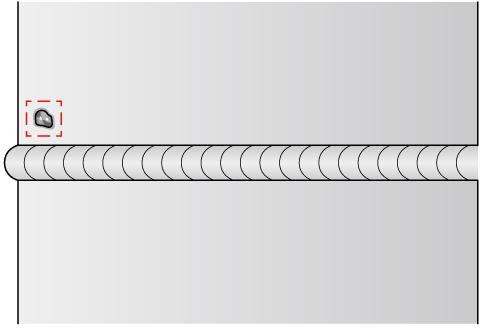
This is a defect caused by instantaneously striking an arc on the base material. In other words, an arc strike is a spot of failed arc ignition which was not fused by subsequent welding and remained on the base material. Arc strike may be the cause of cracking in the base material.
A similar defect may occur when large spatter particles adhere and remain on the surface.
Bead meandering (bent/misaligned bead)
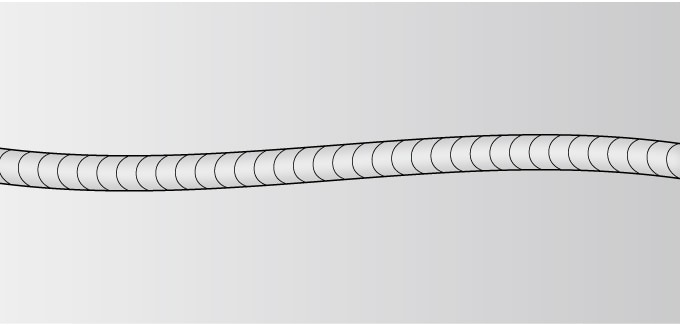
This defect occurs when the bead meanders and deviates from the weld line. Possible causes include the wave or curl in the automatically supplied weld wire not being corrected properly or the directions of the weld line and wire curl being at right angles to each other. This defect may also occur when the settings of the wire supply speed and welding current do not match.
Remaining groove
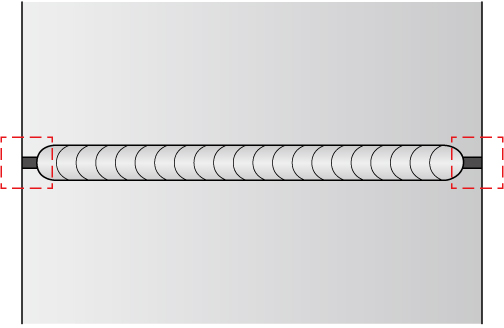
This is a state where parts of the groove are not welded and remain open because the process could not form a bead continuing from the start point to the end point of the groove. When this defect is found in robot welding around the start or end point, there may be a problem in the robot control. If the arc, gas or wire supply is unstable, the groove may also remain open in the middle of the bead.
