Example 1: Weld bead shape inspection
This page introduces examples of using a high-performance laser displacement sensor for appearance inspection of a bead after welding to detect surface defects such as undercut, overlap and insufficient reinforcement.
- Example 1-1: 2D sectional shape inspection of a laser weld bead
- Example 1-2: 3D shape inspection of a weld bead
Example 1-1: 2D sectional shape inspection of a laser weld bead
100% inspection is performed visually after welding, which takes a lot of man-hours and presents the difficult task of securing highly skilled and experienced inspection staff. Human errors such as overlooking minute defects are also a serious challenge. Welding inspection using vision systems or conventional red laser displacement sensors had the problem of erroneous detection caused by light from the welding torch or irregular reflections from targets.
High-speed and stable sectional shape detection using the LJ-X8000 Series
The LJ-X8000 Series High-speed 2D/3D Laser Scanner can detect the cross-sectional shape of targets quickly and stably without being affected by the optical noise found at welding sites. The system can detect targets with various shapes and solve many problems that arise in 100% inspection of welding.

For example, the introduction of the LJ-X8000 Series to the laser welding process of tailored blanks (TBs) enables stable inspection of bead shape immediately after welding by tracking the torch of the robot without affecting the processing time. Fast sampling, up to 64 kHz, ensures stable profile detection even when the sensor head is moved to track the fast-moving torch of automatic welding. This allows immediate detection of welding defects to minimize the production of defective products.
- Comparison of profile detection at different sampling speeds
-

Conventional laser displacement sensor: the projection is overlooked due to the wide inspection pitch.

LJ-X8000 Series: the fine pitch made possible by high-speed sampling prevents overlooking the projection.
- A wealth of measurement modes for checking various targets
-
The LJ-X8000 Series offers 74 measurement modes in total by allowing selection of 16 measurement types and 11 measurement targets. Using these various measurement modes properly allows shape inspection of welds and weld joints of different workpieces.

-
- HEIGHT
-

Measures the height within the specified range.
-
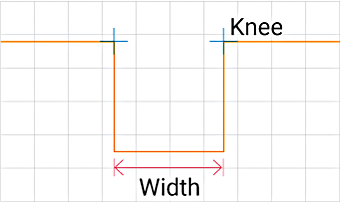
- WIDTH AND POSITION
-

Measures the width and positions under the specified conditions.
-
- ANGLE AND INTERSECTION
-

Measures the angle between and the intersection point of a pair of detected straight lines.
-
- MASTER PROFILE COMPARISON
-

Makes a comparison with a registered master shape and then measures the area with the largest difference in height.
-
- HEIGHT DIFFERENCE
-

Measures the height difference from a reference point to a measurement point.
-
- CROSS SECTIONAL AREA
-

Measures the cross sectional area from a reference surface.
-
- DISTANCE (POINT - POINT)
-

Measures the distance between two points.
-
- RADIUS AND MIDPOINT
-

Measures the radius of a curved profile and the coordinates of the center position of a specified point.
Example 1-2: 3D shape inspection of a weld bead
Three-dimensional (3D) shape inspection enables a wider variety of shape inspections of welds which are impossible with 2D sectional shape data only, including the volume of pits, undercut or overlap, cracking of the bead surface, bead meandering (bent/misaligned bead), improper bead length (such as remaining groove), arc strike, and spatter.
3D shape inspection using the LJ-X8000 Series and an image processing system
The 2D sectional shape data detected with the LJ-X8000 Series High-speed 2D/3D Laser Scanner can be converted into a 3D shape image and then analyzed to achieve precise shape inspection.

Use the LJ-X8000 to obtain the 2D sectional shape data of a weld bead

Process up to 16284 pieces of sectional shape data with an image processing system to generate a 3D shape image.

Analyze the 3D shape image of the weld bead to inspect for various defects.
- Examples of weld shape detections achievable with 3D shape inspection
-

Volume of pits/undercut

Height and volume of overlap/bead

Cracks or recesses in bead surface

Arc strike or spatter

Bent or misaligned bead

Bead length
In addition, various shape defects of welds can be inspected inline.
Example of 3D shape measurement of overlap, insufficient reinforcement, remaining groove, arc strike, and spatter
Detection items

Volume of pits/undercut

Height and volume of overlap/bead

Arc strike or spatter

Bead length

Example of 3D shape inspection and analysis of insufficient reinforcement (recess in bead) after laser welding
Detection items

Cracks or recesses in bead surface

Volume of pits/undercut

Example of 3D inspection and analysis of bead meandering (bent/misaligned bead) and overlap
Detection items

Bent or misaligned bead

Height and volume of overlap/bead


