Laser Profiler / 3D Laser Snapshot Sensor
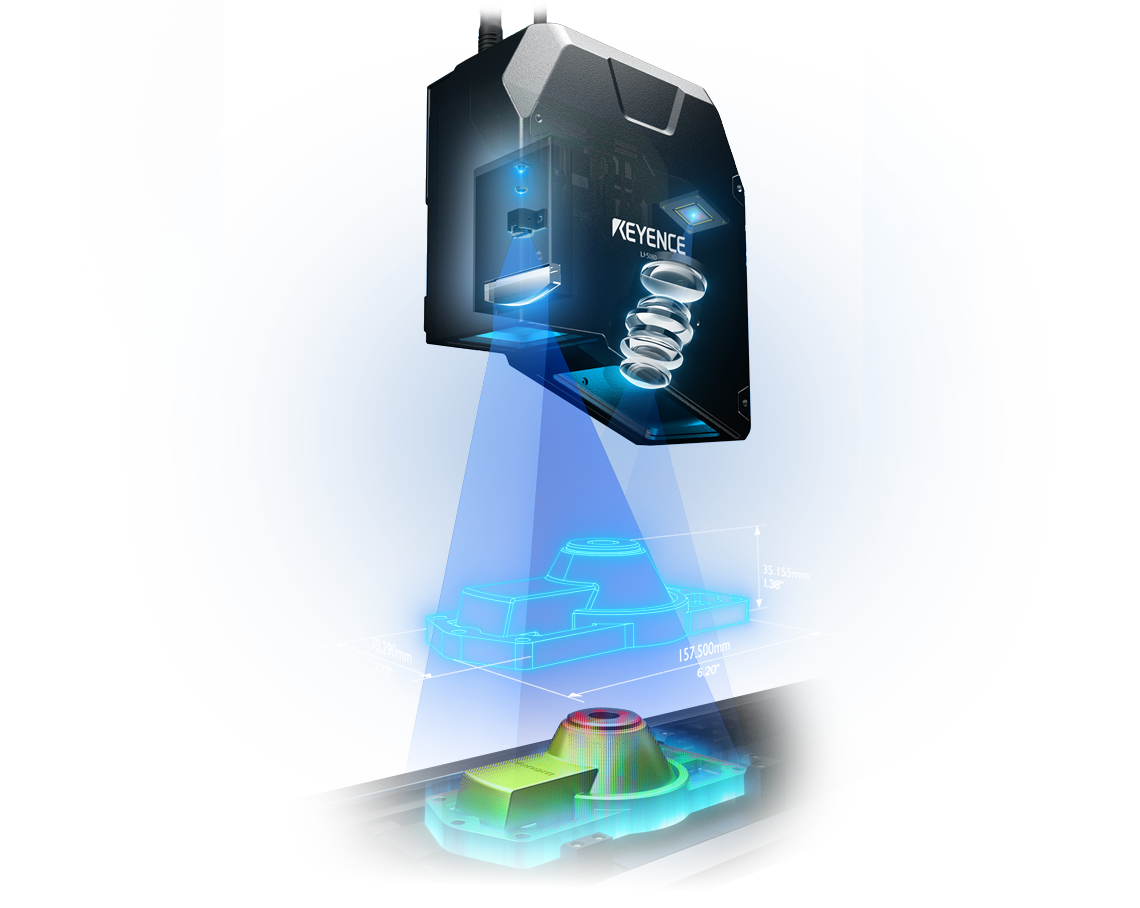
Laser profilers are laser displacement sensors that collect height data across a laser line rather than a single point. This enables 2D/3D measurements such as height difference, width, or angle to be performed using a single sensor. In addition to height data, KEYENCE profile sensors also collect intensity data to provide a stable solution for inline measurement and inspection. The lineup includes a wide range of sensors to support a variety of applications and industries. In addition, our new 3D Laser Snapshot Sensor allows for 3D visual inspections of stationary targets in fractions of a second with a high degree of accuracy, enabling inspection in even more situations.
Recommended Items
Product Lineup
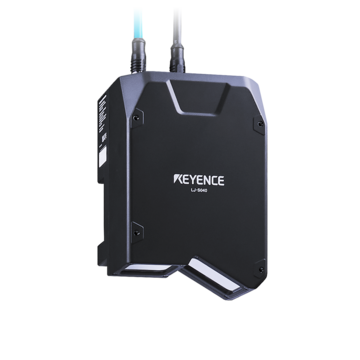
The LJ-S8000 Series 3D Laser Snapshot Sensor is the first in the world to adopt a motor-driven scanning detection method. The built-in laser light source and scanning mechanism eliminate the need for external lighting, lensing, a moving stage, or an encoder. This makes it possible to perform not only inspection (dimensioning, appearance, shape, etc.) but also differentiation just by installing the sensor. Ultra-high-speed, ultra-high-accuracy inline 100% inspections are now possible for a wide variety of targets made from a wide variety of materials with imaging speeds of as little as 0.2 seconds and repeatability of 0.3 µm. Meanwhile, KEYENCE’s Imaging Navigation function makes adjustment as easy as selecting the image with the best quality, eliminating the need for specialized skills and significantly reducing the time and effort needed at startup or when reconfiguring settings.
Features
World’s First Profiler with Built-In Scanning Mechanism! Highly Accurate, Stable Inspection With No Need for Troublesome Adjustments
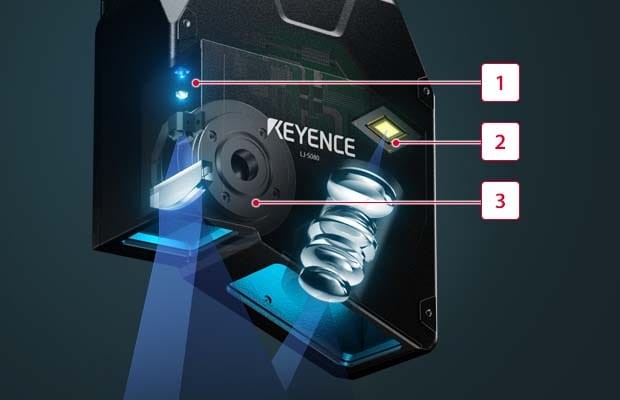
The LJ-S Series utilizes a one-of-a-kind design that allows for scanning of parts by moving the components internally and eliminating the need to move the part of sensor head. This not only makes installation a breeze, but also creates a large depth of field.
-
1High-intensity blue laser
The high light concentration density and sharp image-forming beam enable high inspection accuracy. -
2High-resolution CMOS
-
3Brushless direct-drive motor
The unique brushless design ensures ultra-high durability of the direct-drive motor.
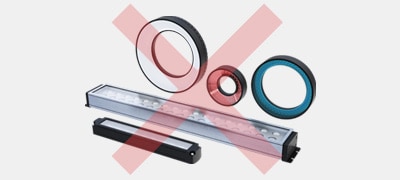
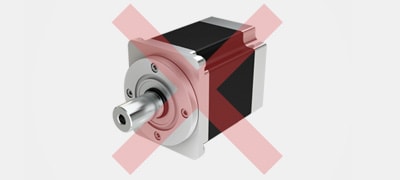
No Lighting, Motion, of Encoders Needed
No lighting required
No stage required
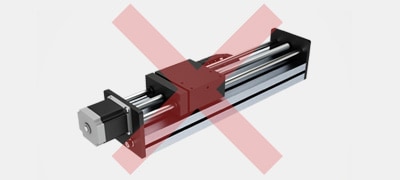
No encoder required

Perform 2D/3D measurement and inspection in-line with the LJ-X8000 Series. Our most versatile lineup of laser profilers offers 3200 points/profile, making it easy to accurately measure any target shape or material and create high-resolution images. The laser profile scanners are compatible with four different controller options, allowing users to select a setup that perfectly aligns system capability with any application requirements. The maximum laser linewidth reaches over 720 mm (28″), and multiple can be paired together to scan even larger targets. Programming for these high-performance sensors is completed in three simple steps, making accurate in-line 3D measurement accessible for users of any experience level.
Features
Improve Reliability with 4x More Resolution
Capturing the true shape of a target is critical for performing reliable inspections. With 3200 points/profile, the LJ-X8000 Series captures target shape in high resolution, enabling accurate inline measurement.
Conventional

- Rough
- Irregular
- Surface dependent
LJ-X8000
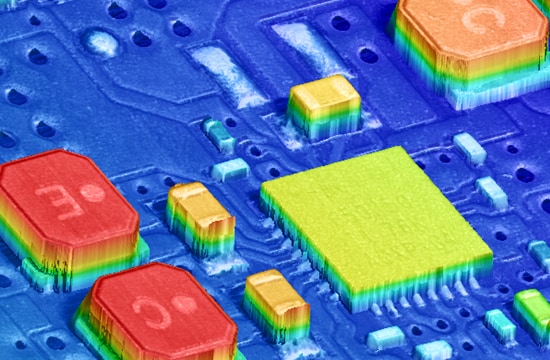
- Detailed
- Consistent
- Stable on any surface
Maximizing Resolution and Target Detection
To improve the resolution of the sensor, the number of pixels on the CMOS needs to be increased. This can be accomplished by making each pixel smaller; however, smaller pixels can result in insufficient light detection, causing an inaccurate profile on some targets. For the LJ-X8000 Series, we’ve implemented new technology to create a laser profiler capable of high-resolution measurement on any target.

Cylindrical lens

Parallel light is emitted using a cylindrical lens designed to prevent the reflected light from scattering across the surface of the target. This ensures reliable reflections from any shape or surface.
Large-aperture receiver lens

The sensor is equipped with a receiver lens that has 3x more area than conventional models, increasing the received light intensity. This allows the sensor to produce stable profiles in any environment.
High-resolution CMOS

This newly developed CMOS enables high-resolution measurement using 3200 points/profile, while delivering improved imaging capability on targets with varying reflectivity.
Profile Alignment Function
When creating a 3D image, the positions of each 2D profile are adjusted in the X, Z, and θ directions. This eliminates the impact of vibration and eccentricity as well as bends and curvature in the target, creating an optimal image for inspection.

Without profile alignment
Without profile alignment, the target image is distorted by vibration, making it impossible to perform accurate inspection.

With profile alignment
Profile alignment allows for an optimal 3D image to be created. This achieves stable, inline inspections for dents, chips, and other defects.

Measure the profile and shape of targets using the high-speed 2D laser profilers of the LJ-V7000 Series. By collecting height data across the laser line, this system makes 100% inspection possible for targets that alternative systems struggle with due to lack of contrast or glare. The sensor's blue laser and specialized CMOS offer a wide dynamic range, enabling the measurement of targets with multiple surface types or colors - ranging from glass and metal to dark rubber. The high-speed sampling (up to 64kHz) enables parts to be measured during transportation, improving production efficiency. The LJ-V7000 Series sensors are also compatible with the controllers of the LJ-X8000 Series to perform 3D measurement and inspection.

This first-generation laser scanner performs simple 2D measurements. The 2D displacement sensors of the LJ-G5000 Series can be used to measure height, height difference, width, and more. The laser line profiler automatically compares measurement values to dimension tolerances, enabling real-time detection of defective parts or processes. Up to 8 measurements can be performed simultaneously, supporting a wide range of inline profile measurement applications.

The WI-5000 Series 3D interference measurement sensors capture a 3D image of target areas of up to 10 x 10 mm (0.39″ × 0.39″) in just 0.13 seconds. The sensor records 80,000 height data points across the surface simultaneously to perform high-accuracy measurements of height, coplanarity, and even surface roughness (Sa and Sz). By utilizing white light interferometry to capture images, the sensor can employ coaxial surface measurement, eliminating dead zones that prevent accurate measurement in grooves and other shapes with sharp height changes. The measurement principle enables accurate, repeatable 3D measurements on nearly any surface type, including transparent or mirrored targets. While its speed makes it ideal for inline measurements, an adjustable stand is also available, allowing users to capitalize on the same quick, automatic measurements for both inline and offline inspections.
Features

Area Measurement, Not Point or Line Measurement
Instantly measure 80000 points over a maximum measurement area of 10 × 10 mm 0.39" × 0.39". Utilizing the principles of white light interferometry, the WI-5000 Series is not affected by material type, color, or blind spots, allowing for high-accuracy, micron-level measurement.

100% Inline Measurement at High Speeds
In order to measure multiple points, the sensor must scan the target quickly and accurately. Doing so requires the stage to be moved, which makes inspection extremely time-consuming. With the WI-5000 Series, measurement is performed over a surface, significantly reducing measurement time and enabling 100% inspection.
Discontinued Series
Laser profilers are laser displacement sensors that collect height data across a laser line rather than a single point. They measure the profile of an object using laser triangulation, a process where a band of light is emitted onto the target, and the reflected light is received using a 2D CMOS to understand the height at numerous points across the line. Measurements such as height, height difference, width, and other measurements can be performed from this 2D profile without touching the target. By compiling profiles during a scan of a part, high-definition 3D representations of a target can be rendered to complete 3D measurements and inspection. The laser profiler's high-speed acquisition of high-resolution profiles enables reliable quality and process control solutions for a variety of applications and industries.
2D Laser Displacement Sensors
The 2D Triangulation Method Is when a laser beam that has been expanded into a line is diffusely reflected from the surface of the target. This reflected profile is formed on the HSE3-CMOS and by detecting changes in the position and shape of the reflection, it is possible to measure the position of various points along the surface of the target.
How Do Laser Profilers Work?
As explained above, 2D laser profilers — such as KEYENCE’s LJ-X8000 — are laser displacement sensors. But instead of measuring a single point, 2D laser profilers measure the displacement of an entire 2D scan line or the displacement of line segments.
This is achieved by projecting a laser line onto the surface of the object whose profile is being captured. The laser light is then reflected into the photo-sensitive element housed inside the laser displacement sensor, where the measured data is compiled, processed, and stored for subsequent analysis.
Laser profilers are incredibly accurate devices, capable of measuring deviation in the single-digit µm range. As a result, they’re used for a variety of applications associated with data capture and quality control processes—not to mention that they’re invaluable in capturing dimensional measurements. Some common uses include part alignment checks, presence/absence detection, and surface defect inspection.
Benefits of Using Laser Profilers
Laser profilers can perform non-contact profile measurements. Unlike contact-based measurement devices, laser profilers can accurately measure the profiles of soft materials or targets that could be damaged through contact. Automating profile measurement also removes the dependence on operators, eliminating the risk of human error or variation in measurement methods, thus improving reliability while reducing inspection time.
Contact-type measuring systems are difficult to use on the surfaces of scratch-sensitive products and electronic components mounted on delicate, precision PCBs. Laser profilers, on the other hand, can perform measurements of these delicate targets during production, without stopping the parts for inspection. Due to their non-contact measurement method, laser profilers can accurately measure the profiles of rubber products, food items, and other such soft objects without changing the shape of the target with pressure from contact. Laser profilers can provide a solution for automatic 100% inspections for a diverse range of industries, processes, and products.
Because 1D laser displacement sensors measure at one point rather than the whole surface, they are somewhat limited for calculating 2D or 3D measurements such as height differences or warpage. Laser profilers provide a solution for scanning wide areas in a single pass, making it possible to complete more complex measurements at high speeds.
Completing 2D measurements, such as height difference, with 1D laser displacement sensors requires either the use of multiple sensors or the installation of a precision stage to adjust the sensor's position relative to the target. This could be difficult due to time or space constraints, and the accuracy is limited to how well the part can be positioned. However, laser profilers measure the height across a surface using a laser line instead of looking at a single point, making it possible to complete height difference measurements across wide areas without the need for motion or multiple sensors. By installing laser profilers into a production line, manufacturers can improve throughput by performing height difference, warpage, and other 2D/3D measurements without stopping the product.
Camera-based inspection can be difficult for certain applications due to lighting conditions, lack of color contrast, or height differences in the target. Additionally, the scope is limited to 2D measurements, so height inspection must be completed separately. Laser profilers can complete 3D inspection and defect detection of any material without external lighting.
Conventional area cameras and line scan cameras need lighting fixtures to be installed. In some cases, it can be difficult to set conditions due to unevenness of color, patterns, gloss, and other characteristics the target may have. Furthermore, cameras cannot measure height, and even aiming from an angle does not enable reliable inspection due to the inability to fully focus an image from the front to the back of a target. On the other hand, laser profilers can measure heights without external lighting. With only a sensor head installed, a laser profiler can be used to inspect height and other 3D profile data by capturing the object's shape from above. Laser profilers can also achieve reliable inline profile measurements without being affected by color differences, patterns, and other characteristics of the target object.
Laser Profiler / 3D Laser Snapshot Sensor Case Studies
Automotive
High-speed laser profilers can follow the applicator system (dispenser nozzle) to measure and inspect the 3D profile of sealants and freshly applied adhesives in real time. As laser profilers are free from the impact of radiant light, they can be used for measuring just-welded beads by following the torch of the welding robot. Other applications include appearance inspections of parts and products as well as other 3D profile measurements that were previously impossible for automated inline inspections. KEYENCE introduces the next generation of automated 100% inspections that can only be achieved with laser profilers.
EV parts
Batteries―one of the most important components of electric vehicles―must meet high quality and safety standards. A laser profiler can automatically perform 100% inspections in a broad range of processes, including coating application quality during the manufacturing of lithium-ion batteries and the 3D profile measurement of electrodes and weld beads for lid sealing of square cases. Click here to explore other examples of automatic appearance inspection of key parts related to motors and connectors.
Electronic parts
Inspection needs are growing with the increasing demand for smartphones, tablets, and wearable devices, along with the trend for smaller sizes and higher functionality. KEYENCE enables automatic 100% inspections using laser profilers in the electronic parts industry, including profile measurement of PCB warpage and solder pastes applied on PCBs, oil seal, and O-ring insertion inspection for the casing, and coplanarity inspection of pins.
Semiconductors
Laser profilers are very effective for semiconductor processes where precision and stability are required, thanks to their ability to measure without negative impacts from part gloss or color variation. Wafer edge profile and positioning accuracy play a huge part in reducing loss and efficiently manufacturing quality chips. KEYENCE showcases examples of introducing laser profilers that offer reliably precise measurements and inspections of wafers with unique gloss for profile inspections of notch positions and edge shapes.
Height and height difference measurement
A typical problem encountered in inspections is the occurrence of measurement errors due to the target object being tilted. KEYENCE introduces examples of height and height difference measurements using a laser profiler equipped with a tilt correction function for accurate measurement. How the laser profiler works is explained using a measurement example that involves both transparent and mirrored surfaces as well as a comparison with contact-type measuring systems.
Width measurement
Laser profilers can provide inline measurement of a target's width in any position. KEYENCE introduces examples including a case using a laser profiler to measure the width of elastomers. Alternative solutions for non-contact width measurement are also explained.
Angle measurement
Laser profilers can measure angles quickly and precisely without using multiple sensor heads or external calculations. KEYENCE introduces an example that improves the quality of automatic welding by instantly measuring the groove shape, position, and angle ahead of the torch of the automatic welding machine and providing feedback to the system.
Warpage and flatness measurement
A single laser profiler accurately measures the warpage and flatness of a target using the height data from under the laser line. Measurements and inspections are performed simply and speedily thanks to this laser profiler’s ability to detect and measure the height peak and bottom points and warpage width from the obtained profile data.
2D profile measurement
Laser profilers equipped with single-shot HDR can provide fast, high-precision measurement of the 2D profile of treads even while the tires (which have low color contrast) are in motion.
The 3D profile can also be measured by acquiring the profile data of the entire circumference of the rotating tire and subjecting it to image processing. This section provides such examples.
3D profile measurement
Laser profilers are capable of performing inline 3D inspections on any object. Reliable 100% inspections can be achieved without affecting cycle time by leveraging the high-speed sampling, high precision, and high-performance position adjustment functions of laser profilers. In this introduction, KEYENCE refers to 3D displacement sensors that can instantly batch-measure the height at multiple points, which supports a wide range of applications, including part defect inspection.

This site introduces proven solutions in various industries, including automotive, film & sheet, and electric & electronic components for laser profilers, as well as our other laser displacement sensors and measurement systems. Applications can also be explored by measurement types, such as thickness, width, height, height difference, and 3D inspections.
Frequently Asked Questions About Laser Profilers
Yes, 2D laser profilers and cameras are fundamentally different pieces of equipment, both in their operation and their purpose.
Cameras — unless they’re highly advanced 3D imaging cameras — capture two-dimensional images. Laser profilers, on the other hand, measure height data to get the precise shape and dimension of objects. This height data can then be combined into a 3D image of a part.
Furthermore, cameras rely on ambient lighting to capture images, whereas laser profilometers emit light to illuminate the object and capture its geometry based on the reflected light.
Lastly, data outputs of laser profilers and cameras widely differ. Cameras capture photographic images and videos in digital form, but they’re capturing 3D data and presenting it through a 2D plane.
Laser profilers work differently. They output 2D or 3D data, typically in the form of point clouds or surface models, which represent the exact dimensions and relative positioning of features present in an object's shape.
Because they’re able to provide precise, non-contact measurements, laser profilers are used across a wide range of industries.
Manufacturing industries rely heavily on laser profilers during critical steps in production to ensure the dimensional and geometrical accuracy of their product and the presence/absence of components in assemblies.
Laser profilers are also used in the automotive industry for a wide variety of tasks, ranging from weld inspections to 360° surface inspection, uniformity inspection, and chassis and body inspections.
The electronics industry, with its ongoing miniaturization, also relies on laser profilers to inspect the positioning and alignment of components onto the PCB before and after soldering (some components may move during the solder melting process). Laser profilers are also used to identify cracks and cold solder joints, plus any possible issues with the PCB board itself.
Other industries — including aerospace, construction, and food and beverage industries — also rely on laser profilers for their manufacturing, quality assurance, and quality inspection operations.
The LJ-V7000 Series and LJ-X8000 Series both support advanced 3D profile measurement and inspection, not to mention 2D profile inspection using inline profile measurement.
The LJ-X8000 Series achieves 3200 pixels along the X-axis per profile, enabling super-high-definition profile measurement in both the X and Z-axis. These laser profilers are capable of accurately capturing minute profile features. The LJ-V7000 Series provides high-speed sampling, up to 64 kHz, contributing to shorter cycle times using fast, precision inline measurement and inspection.
Both series adopt a blue laser, which offers stable measurement and inspection without being affected by the target’s material, color, or temperature conditions.
One head can measure up to a width of 720 mm (LJ-X8000 Series). Our laser profilers can automatically inspect the full width and the total length of sheets, films, and other wide objects with only one sensor head or multiple sensors paired together. Their simplicity makes them easy to integrate into existing systems, but they are very powerful inspection tools and can detect the smallest unevenness on the surface from one end to the other without stopping the roll-to-roll machine movement thanks to their high-speed sampling capability. Additionally, unlike conventional cameras, laser profilers do not require that the head position be readjusted even for sheets with different thicknesses or colors, making them capable of measuring a variety of products easily and quickly.
Most definitely. KEYENCE not only offers a 3D image processing and inspection package but also a dedicated profile output model (LJ-X8000A) that specializes in and is only designed for use with profile data output. Because raw profile data measured by a laser profiler can be directly imported into a computer, this data can be introduced into 3D inspections using an existing system and existing machine vision libraries without any extra costs. This model is bundled (free of charge) with a HALCON-compatible version of sampling software that supports various machine vision libraries.
2D profile scanners, often referred to as laser line sensors or laser line scanners, are primarily used for scanning and measuring shapes and geometries of objects and their surfaces. These scanners emit a laser line onto a target surface, which is reflected off the surface and captured by the built-in camera/sensor to generate a profile. These scanners are most commonly used for measuring width, height, gaps, or angle, detecting any defects, dents, or protrusions on the object’s surface, monitoring material uniformity, evaluating wear and tear in mechanical parts, and inspecting weld seams in manufacturing processes.
3D profilers build on the capabilities of 2D laser scanners by creating a three-dimensional representation of surfaces and objects. This is typically done by either scanning across the object in a controlled manner or by combining multiple 2D profiles into one that’s three-dimensional.
Given their ability to see or scan the third dimension, 3D laser profilers have found applications in surface inspection, volumetric measurements, monitoring deformations, and material warping, as well as reverse engineering, part replication, 3D mapping and topography of large areas, and quality control and verification in manufacturing processes. Additionally, they’re easily integrated with other automation systems, which have proven useful for robotic guidance and material handling.
You can generate a 3D profile using a 2D laser by moving either the scanner or the object being scanned along the third axis, which is typically perpendicular to the 2D scanning direction. With multiple 2D scans of the object, the associated software combines these 2D profiles into a complete 3D representation of the actual object’s surface. This process is often performed by integrating encoders and other position-tracking mechanisms to ensure precise object surface mapping.
When it comes to comparisons between 3D laser Profilers and vision systems, the best metrology technology depends on your needs and requirements. As their name implies, 3D scanners excel in providing depth/height information with fine resolution, making them suitable for applications that require detailed 3D surface scans. They’re also faster in data acquisition compared to vision systems, better at intricately detailed surface scans, and handling a broader material range and surface conditions. However, 3D laser scanners do require motion, while Vision Systems typically work on stationary parts.
Vision Systems, on the other hand, provide exceptionally high-res 2D scans and are great for applications and tasks in which color recognition and pattern matching matter. But they’re considerably slower compared to 3D lasers.
![Key Technology and Application [Profile measurement]](/img/asset/AS_108927_L.jpg)
Conventionally, profile measurement and 3D measurement have been difficult to perform inline. This guide uses practical examples to explain how accurate, high-definition measurement and inspection can be easily achieved with the latest laser profilers.
![Key Technology and Applications [3D Measurement]](/img/asset/AS_110781_L.jpg)
This guide compiles examples of 3D measurement applications using the LJ-X8000 Series 2D/3D laser profilers. Benefits in various inspection processes and items are explained concisely with graphics.
Conventional contact-type measuring systems and camera-based inspection have known issues. This guide uses different processes and target objects as examples to detail how laser profilers can solve these issues with non-contact 3D measurement. This is a perfect introductory guidebook for users new to laser profilers.
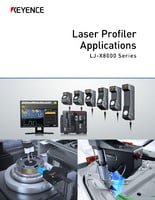
This guide offers many examples of 2D and 3D profile measurements and inspections using laser profilers. The high-definition imaging of the LJ-X8000 Series at 3200 points per profile enables reliable detection of even the slightest defects.

A must-read for users looking for a solution to the problem of measuring and inspecting large products! This guide explains the benefits and real-life cases of improvements achieved by the ultra-wide range, high-definition laser profiler in the LJ-X8000 Series that supports an X-axis width of up to 720 mm with a single sensor head.


