Optical Comparator (Profile Projector)
Gamma Aerospace: Metrology Upgrades

Learn about the new Gamma Aerospace upgrades and the metrology capabilities; including the IM Series and its CAD capabilities. Understand more how these advances have improved accuracy and efficiency in manufacturing processes.
Structural Success
Aerospace manufacturing company upgrades its inspection capabilities with two new pieces of equipment from KEYENCE. Gamma Aerospace LLC introduced KEYENCE's version of an optical comparator, the IM Series Instant Measurement System, and the XM Series Handheld CMM. Immediately, Gamma Aerospace increased efficiency in inspection while staying precise and compliant with regulations.
Gamma Aerospace LLC produces big parts: stringers and struts, doors and access panels, seat tracks, spars, and more, some longer than a pickup truck. In fact, if it's used to construct a commercial airliner, helicopter, or military aircraft, chances are good that it came from Gamma.
But the Mansfield, Texas manufacturer makes plenty of small parts as well—the brackets and fittings, for example, that are needed to assemble larger structural components into a functioning aircraft. This product diversity was the problem facing Gamma's director of quality and operations, Jason Jackson: how to measure the miniature in a shop geared towards the macro?
We’re here to provide you with more details.
Reach out today!

Terrific Capabilities, Tiny Needs
"Our digital inspection area has an array of measuring equipment, including coordinate measuring machines (CMMs) and portable inspection arms, but even our smallest CMM has an 8-foot bed, and the arm has a 6-foot inspection envelope," he says. "These are fine for our larger parts, but we also machine an awful lot of small, tight-tolerance parts. We found it time-consuming and a little awkward to set up a humongous measuring machine for parts that you can hold in your hand."
One of these was a triangular, two-inch long metal clip destined for Lockheed's F-35 fighter jet, which Gamma machines in quantities of 300 parts per month. Until recently, one of Jackson's team members would inspect a representative sample of each production lot on one of the CMMs, but because the parts would later be cadmium plated, it was necessary to 100% inspect each of the part's three close-tolerance holes, verifying they would meet post-plating tolerance requirements.
"The CMM part of the inspection process wasn't super long, maybe 10 minutes or so, but we had to use an inside micrometer to check all the holes," Jackson explains. Jackson recognized Gamma Aerospace had to meet regulatory compliance for the jet, but the inefficiency of manually inspecting 900 holes was glaring. Jackson knew he needed a change in the process. "Think about hand-checking three-hundred parts times three holes each—that's 900 holes per job. That's what got me thinking about The KEYENCE optical comparator."
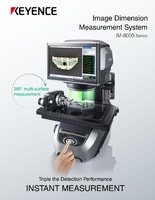
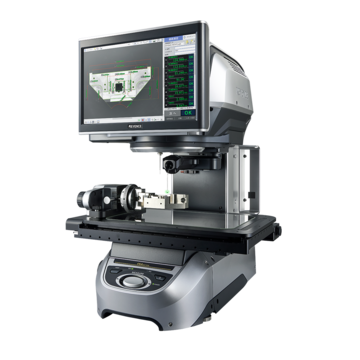
Jackson is a chemist by trade. He'd used the inspection equipment provider's digital microscopes in the past and says "he loves KEYENCE equipment." So, when he was approached by the local system specialist about the company's IM Series Instant Measurement System, the next-generation, automated optical comparator, Jackson welcomed him in for a demonstration.
Transitioning Teams and Technologies
There's more to this story than finding an efficient way to check small parts, however. Jackson was also plagued with a problem that virtually all manufacturing companies can relate to: finding qualified people—in his case, inspectors. Jackson knew that adding new technology to Gamma Aerospace could drive up costs for training and hiring new inspectors for his team.
Fortunately, he soon discovered a way to address both of these issues. In his demo with KEYENCE, Jackson saw how the IM systems only require a simple "place and press" process for measuring. Immediately, he recognized there was no need for a specialist to come in and figure out a complex optical comparator machine.
He also saw that the IM Series Instant Measurement system measures up to 300 dimensions on up to 100 parts in seconds. Compared to Jackson's previous 10 minutes working on 300 holes for the Gamma Aerospace fighter jet, he couldn't believe it.
Jackson knew that if he could figure out the IM, so could his current colleagues at Gamma Aerospace. His worry about finding new inspectors dissipated when he realized he didn't need to look outside his colleagues for more qualified inspectors. Jackson also saw that the tools took care of all the tedious statistical analysis. KEYENCE's IM creates statistical modeling, graphs, and histograms that do not require specialized technicians to utilize and understand.
Since 1971, Gamma Aerospace has made a name for itself as a leader in aerospace component manufacturing. With extensive machining capabilities as well as proficiency in deep drawing, forming, bending, and assembly, the company has attracted customers such as Boeing, Bell Helicopter, Spirit AeroSystems, and others.
Once a family-owned company, Gamma was acquired by the Chicago-based private investment firm Ashland Capital Partners in March 2017. Since then, the company has invested heavily in new equipment and manufacturing technology. During a board meeting late last year to review department needs, Jackson was asked to define his biggest hurdle going forward.
"Though we had some great equipment at our disposal, we were definitely lacking the right tools to measure the smaller parts," he says. "But even if we'd had those tools, our biggest bottleneck was a lack of skilled inspectors. So, when the board asked me what I was going to do to resolve the situation, I told them about the KEYENCE equipment, explaining that it would not only solve our small parts challenges but was easy enough to use that we could leverage less experienced people to operate it."
The board's response: "Why haven't you bought it yet?"
Get detailed information on our products by downloading our catalog.
View Catalog

Two New Tools
Jackson took the board's approval and ran with it. He ordered a KEYENCE IM Series Instant Measurement System as well as the XM Series Handheld CMM for easy 3D and GD&T measurement. The XM Series Handheld CMM proved to be as easy to use as the IM. The handheld design only required three simple steps: select the element, touch the probe to the measurement location, and press the button.
Jackson's Gamma Aerospace colleagues comfortably tackled the new technology. The CMM offers easily achievable distance measurement, angle measurement, and parallelism measurement.
Furthermore, Jackson also saw that the CMM had the same statistical capabilities of graphing, analysis, and recording that the IM had in his demonstration. Jackson also appreciated that KEYENCE's CMMs and IMs are NIST traceable and have tight tolerances for error. By early 2019, they were busy measuring parts with both. For the triangular clip mentioned earlier, he says the IM is not only significantly faster than the previous inspection method, but much more accurate as well."
"We can check a complete part in just a couple minutes now, and measuring the holes literally takes just a few seconds," he says. "There's no need to align the part, no fixture—we just set the part or even multiple parts on the stage and push the button. The KEYENCE optical comparator goes out and finds whatever's on the stage, identifies a pre-defined key feature, electronically orients the part, and gets measuring. The dimensions are recorded automatically, and as long as you can tell the difference between a green light and a red one, anyone can operate it."
The team has programmed dozens of other parts since the IM and XM's arrival. Since the KEYENCE units are so easy to use, Jackson was able to transfer one of Gamma's CNC machine operators from the shop floor to quality control to begin training him as an inspector; while the would-be QC technician operates the inspection systems, his more experienced colleagues are now free to work on the shop's larger parts.
"The programming is super easy, the software has a bunch of different measuring routines, and there's even an import function, so we can pull in CAD files and use them as a starting point," he says. And it's true—CAD drawing data in a DXF format can be imported easily and quickly to create measurement program files. In turn, the 3D and 2D CAD files offer seamless troubleshooting, 3D printing for parts, and reverse engineering.
"For this workpiece in particular, it's been a huge improvement, but The KEYENCE optical comparator and CMM units quite simply rock. To be honest, I was a little worried at first about throwing new technology into our equipment mix, especially considering how much we've always relied on our conventional CMMs, but everyone in the department took right to it. Now they just love KEYENCE."
Overall, Gamma Aerospace's efficiency has skyrocketed since the introduction of KEYENCE's IM and CMM in 2019. Time inspecting or measuring and recording has gone from hours to a matter of seconds. And with the strict regulations put on the aerospace industry that can be a matter of life or death, Gamma Aerospace can be confident that there are no accidental human errors that compromise regulatory bounds.
In addition, Jackson doesn't have to worry about asking the board for more budgeting in the future. Gamma Aerospace will have no ongoing costs for ownership, meaning free software upgrades and recertification of calibration autocalibration.
Want to see how KEYENCE has helped other companies improve operations? Check out our case studies here.
Contact us to learn more about how our advanced technology can help take your business to the next level.
Contact Us
Related Downloads

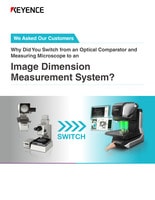
We asked our customers why they switched from conventional technologies to the IM Series Instant Measurement System. See how this system adds value to any inspection process.

See common optical comparator application examples measured on the IM Series Instant Measurement System. Application examples include: turned parts, machined parts, springs, stampings, fasteners, gaskets, etc.
![IM Series Q&A: Frequently Asked Questions [Summary]](/img/asset/AS_124476_L.jpg)
FAQ about the IM Series next-generation optical comparator and how it compared to conventional technology including vernier calipers, micrometers, and optical comparators.


