- Home
- Solutions
- Case Studies
- KEYENCE VHX-970F Microscope Proves that Knowledge is Power at TDK-Lambda UK
KEYENCE VHX-970F Microscope Proves that Knowledge is Power at TDK-Lambda UK
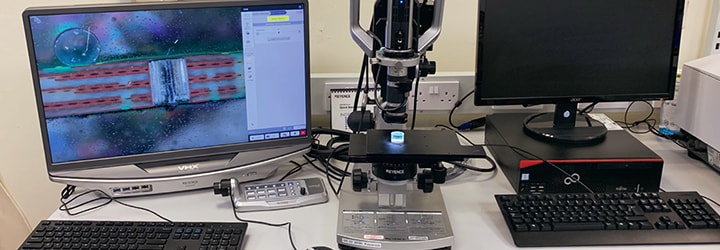
TDK-Lambda UK, a major manufacturer of power supplies to markets such as medical and industrial, is taking advantage of a newly installed KEYENCE VHX-970F high-accuracy digital microscope to drive the company’s inspection and quality function. With such a reputable global brand, there is no margin for failures.


Part of Japanese multinational electronics giant TDK Corporation, TDK-Lambda UK is Britain’s largest designer and manufacturer of both standard and configurable AC-DC and DC-DC power supplies. The company’s 350-employee facility in Ilfracombe is home to its manufacturing, new product development, sales and service functions. A key part of delivering business success at TDK- Lambda UK is component engineering.
“As a department, we’re responsible for component analysis; looking at alternative or new components that we test for robustness and conformity to data sheet specifications,” explains Component Engineering Manager Dan Massey. “We also look after supplier quality from our contract manufacturers, while further responsibilities include goods inwards, sample inspection and compliance with RoHS.”
TDK-Lambda UK’s previous KEYENCE microscope served the company well for around 15 years but it upgraded to keep pace with the latest innovations and improvements.
“We saw the KEYENCE VHX-970F high-accuracy digital microscope and knew it would meet our requirements,” says Massey. “Also, staying with KEYENCE meant we could continue using our existing lenses. It was an easy choice.”
As an option, the company invested in a digitally controlled Z-axis for the VHX-970F that it did not have previously.
“It allows us to automate the focus, assisting ease of use,” he says. “Supported by the microscope’s impressive depth of field we can also use the digitally controlled Z-axis to take multiple images from different height perceptions if we have a particularly awkward or complex component to inspect.”
The KEYENCE VHX-970F has three main roles on site at TDK- Lambda UK. Firstly, to discover the cause of failures in new or alternative components prior to allowing their use in production, the company will encase the part in a clear resin before using fine polishing paper to grind down through the component and inspect it at each step under the microscope. The objective is to identify cracks, burn marks or any other suspicious internal flaws.
“We also use it for inspecting wire crimps, making sure we have the correct compression and right fill in the crimp barrel,” explains Massey. “Using the VHX-970F provides exceptionally reliable results because of the ultra-high resolution it can provide, while its ultra- fast frame rate is much quicker and easier than performing a physical pull test on the crimp.”
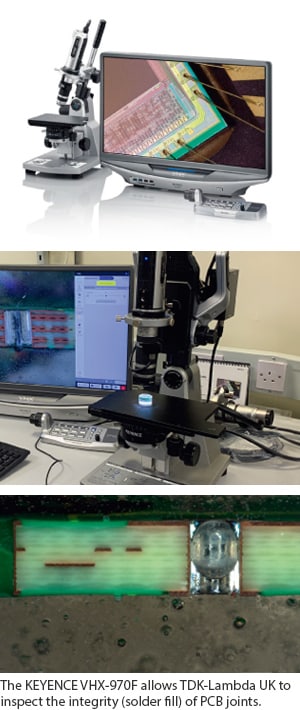
Thirdly, the VHX-970F checks factors such as solder fill on the company’s PCDAs (power control and distribution assemblies).
APPLICABLE PRODUCT CATALOG
Related Products
-
- 3D Surface Profiler
VK-X3000 series -
The VK-X3000 3D Surface Profiler uses a triple scan approach, where laser confocal scanning, focus variation, and white light interferometry measurement methods are used, so that high-accuracy measurement and analysis can be performed on any target. The VK-X3000 has a resolution of 0.01 nm and can scan areas up to 50 × 50 mm (1.97″ × 1.97″), allowing for measurement of the overall shape of the target while still maintaining high-resolution for analysis of minute surface features. KEYENCE's new 3D Surface Profiler can handle any target, including those with transparent or mirrored surfaces, large height changes, or steep angles.
- 3D Surface Profiler
-
- 3D Optical Profilometer
VR-6000 series -
The VR-6000 optical profilometer performs non-contact measurement to replace stylus profilometers and roughness meters. This 3D profile system captures full surface data across the target with a resolution of 0.1 µm, enabling measurement of features that cannot be performed with probe-type instruments. The new rotational scanning greatly expands the measurement capabilities of the system. True-to-life cross section measurements can be performed with no blind spots. Wall thicknesses and recessed features can be measured without cutting or destroying the target. In addition, the HDR scanning algorithm provides enhanced scanning capabilities for instantly determining the optimal settings to capture high quality data, even on glossy and matte surfaces.
- 3D Optical Profilometer
-
- 3D Scanner CMM
VL-800 series -
The VL-800 Series 3D Scanner CMM is the first in its lineup to feature 3D-AI, making high-quality 3D data acquisition and analysis effortless for any user. The system intelligently recommends optimal scanning, stitching, and measurement methods based on the shape of the part being analyzed. Additionally, scanned parts can be directly compared to their CAD models for quick visualization of differences, or the 3D scan can be used to streamline reverse engineering processes. From scanning to STEP file output, the VL-800 handles everything automatically, and provides accurate data in a format accessible by any CAD software.
- 3D Scanner CMM
- PLEASE
CONTACT US


