- Home
- Solutions
- Case Studies
- KEYENCE Microscope at Cutting-edge of Research into Self-healing Materials
KEYENCE Microscope at Cutting-edge of Research into Self-healing Materials
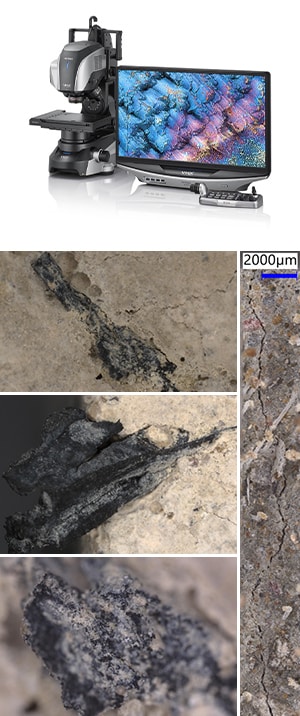
A KEYENCE VHX-7000 4K ultra-high accuracy digital microscope is at the centre of cutting-edge research into self-healing materials required by the construction sector. Situated in the recently established DURALAB facility at Cardiff University, the microscope is bringing enhanced efficiency and reliability to a number of critical tasks.


Although self-healing materials might sound like science fiction, in reality they are here now. Among those leading ground-breaking research in this area is Cardiff University and Dr Riccardo Maddalena, a Lecturer in Civil Engineering at the School of Engineering. He is also the Director of DURALAB, the first interdisciplinary durability testing facility in Wales. DURALAB is capable of simulating hundreds of years of material ageing and environmental deterioration in a matter of weeks.
“During the establishment of DURALAB, we had a vision for the facility that involved a powerful microscope to understand any microstructure or surface changes related to durability or deterioration factors,” says Maddalena. “I had used KEYENCE microscopes previously at the University of Tohoku (Japan), where I discovered their power and efficiency.”
He duly invited KEYENCE to Cardiff for a demonstration of the VHX-7000 4K ultra-high-accuracy digital microscope.
“The demonstration was very convincing,” he states. “In particular, the price-to-performance ratio of the VHX-7000 was far better than competitor products.”
Today, the KEYENCE VHX-7000 is busy performing a number of research-critical functions at DURALAB. Among regular users is Cristina De Nardi, a Leverhulme Trust Research Fellow. Her research includes experimental investigations into the self-healing behaviour of lime mortars for the structural restoration of historic masonry constructions.
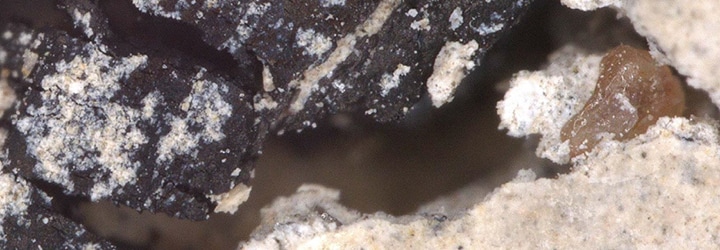
“I find the KEYENCE microscope useful for many reasons,” she says. “For instance, through the stitching of separate high-magnification 3D images, I can decipher depth information and get a good look at surface roughness. I can obtain a lot of information from a single image.”
Maddalena confirms that image stitching and automatic calibration are particular highlights of the VHX-7000.
“When using previous microscopes, it was painful to perform calibration because it would involve placing an external reference scale over the sample,” he explains. “In contrast, a one-click operation on the VHX-7000 automatically calibrates each lens. Our research is therefore more efficient and reliable.”
DURALAB’s growing reputation means it regularly hosts international guests, including Dr Tim Van Mullem, Project Manager of the SMARTINCS (Self-healing, Multifunctional, Advanced Repair Technologies in Cementitious Systems) project at Ghent University in Belgium. He is also a post-doctorate researcher currently on a research stay at Cardiff University.
“Research stays are always limited in time, so I need to get a lot done as quickly as possible,” he says. “It means making many specimens of purposely damaged self-healing materials and then defining the crack widths. Here, the microscope is super-helpful as it can scan the entire specimen surface and digitalise it for later measurement. Using equipment at Ghent University, I would need to take a picture and manually move the specimen, take a new image and move it again; each time marking the different location. The KEYENCE microscope automates this task and digitalises the entire crack, which gives me much more data. In the time I would previously require three images, the VHX-7000 can take 20 and combine them into a single stitched image.”
Researchers from other schools at Cardiff University are also taking advantage of the VHX-7000. The School of Pharmacy, for instance, is using it to detect the surface deterioration of PVC flooring that results from UV cleaning, while the School of Bioscience is researching levels of micro-plastics in seawater algae and fish.
APPLICABLE PRODUCT CATALOG
Related Products
-
- 3D Surface Profiler
VK-X3000 series -
The VK-X3000 3D Surface Profiler uses a triple scan approach, where laser confocal scanning, focus variation, and white light interferometry measurement methods are used, so that high-accuracy measurement and analysis can be performed on any target. The VK-X3000 has a resolution of 0.01 nm and can scan areas up to 50 × 50 mm (1.97″ × 1.97″), allowing for measurement of the overall shape of the target while still maintaining high-resolution for analysis of minute surface features. KEYENCE's new 3D Surface Profiler can handle any target, including those with transparent or mirrored surfaces, large height changes, or steep angles.
- 3D Surface Profiler
-
- 3D Optical Profilometer
VR-6000 series -
The VR-6000 optical profilometer performs non-contact measurement to replace stylus profilometers and roughness meters. This 3D profile system captures full surface data across the target with a resolution of 0.1 µm, enabling measurement of features that cannot be performed with probe-type instruments. The new rotational scanning greatly expands the measurement capabilities of the system. True-to-life cross section measurements can be performed with no blind spots. Wall thicknesses and recessed features can be measured without cutting or destroying the target. In addition, the HDR scanning algorithm provides enhanced scanning capabilities for instantly determining the optimal settings to capture high quality data, even on glossy and matte surfaces.
- 3D Optical Profilometer
-
- 3D Scanner CMM
VL-800 series -
The VL-800 Series 3D Scanner CMM is the first in its lineup to feature 3D-AI, making high-quality 3D data acquisition and analysis effortless for any user. The system intelligently recommends optimal scanning, stitching, and measurement methods based on the shape of the part being analyzed. Additionally, scanned parts can be directly compared to their CAD models for quick visualization of differences, or the 3D scan can be used to streamline reverse engineering processes. From scanning to STEP file output, the VL-800 handles everything automatically, and provides accurate data in a format accessible by any CAD software.
- 3D Scanner CMM
- PLEASE
CONTACT US


