3D Scanner

Reverse engineering is a technique that is now receiving much attention because of the large advantages it can deliver in R&D processes and part production processes. For example, it can yield large benefits in R&D processes by shortening developing periods and reducing costs; it can also benefit in manufacturing processes when restoring deteriorated molds or duplicating parts that do not have drawings. At the same time, reverse engineering involves issues such as complicated measurement work, and the need for advanced technology and large numbers of man-hours.
However, there are high expectations for 3D scanners, which have become popular in recent years, as a device that can resolve these issues.
This section explains basic knowledge about reverse engineering and the 3D scanners which are used. It also introduces key points for resolving problems.
Reverse Engineering
Reverse engineering involves analyzing the structure of existing products, parts, and software to investigate and measure the part configuration, source code, or other components and reveal the technologies and design which they contain.
In the manufacturing and machining industry, it refers to a technique of measuring the shape of a product or part in order to create drawings. Normally products are produced based on drawings; however, this method does the reverse and creates drawings from the products. Hence the name reverse engineering.

A : Product B : Reverse engineering
(1) Shape measurement (2) Analysis and data processing (3) CAD data design documents
Objectives of reverse engineering
With reverse engineering, it is possible to reproduce design drawings by measuring actual products and preparing CAD data. For example, this method can create drawings for parts that cannot be used because they are produced by a competitor, products where drawings no longer exist because of manufacturer bankruptcy or because the product is old, and prototype products that do not have detailed drawings.
Development using reverse engineering can shorten the development period and reduce costs by developing a new product while referring to the design drawings of an existing product. Another advantage is that it can shorten the development cycle, allowing new products to be marketed faster than competitors.
In manufacturing processes, it can help when restoring deteriorated molds and duplicating parts that do not have drawings, and can help in maintaining production quality and obtaining new orders.
Laws which must be observed in reverse engineering
Reverse engineering is a legal activity; however, a product may include a variety of patents or copyrights, and careful attention is required to avoid infringement of intellectual property rights when utilizing the analysis results.
For example, when a technology has been patented, or when technical information is in conflict with the three requirements for a trade secret (kept secret, useful information, and not publicly known) under the Unfair Competition Prevention Act, its use may not be permitted.
To utilize information obtained through reverse engineering, it is necessary to confirm that use of the information does not violate patent law and the Unfair Competition Prevention Act.
We’re here to provide you with more details.
Reach out today!

3D Scanners Used in Reverse Engineering
It is no exaggeration to say that the reverse engineering that is essential when measuring the dimensions of product components was made possible by the improved performance and reduced costs of 3D scanners. 3D scanners are broadly classified into contact and non-contact types, and each has its own advantages and disadvantages.
What is 3D scanning?
3D scanning is a technology that converts the 3D shape of an object (product) to digital data. It is also called 3D digitizing. LED light, a laser beam, or probe contacts the product surface to detect surface irregularities. Coordinate data is then acquired for X (height), Y (width), and Z (depth) to create 3D data.

Bridge coordinate measuring machine
Contact 3D scanners
A contact-type 3D scanner applies a contactor called a probe at the spot to measure and acquires surface irregularities in the form of coordinate values. Compared with a non-contact type, this type provides superior measurement accuracy, and can measure products which cannot be measured by a non-contact type due to a reflective surface.
On the other hand, it cannot measure narrow spaces that the probe cannot enter. The size of the products that can be measured is also limited. Furthermore, because measurement is performed on points or lines, data acquisition takes a long time when the target has a large surface area.
One typical example of these measuring instruments is a bridge coordinate measuring machine.

3D scanner coordinate measuring machine
Non-contact 3D scanners
This machine directs LED light or a laser beam onto the target product to obtain 3D profile data by analyzing the time difference before the reflected light arrives, and the reflection angle.
Scanning methods include pattern projection and light-section method. There are also fixed types and hand-held types. They are each used differently, often with the first scan performed using a fixed type, and then a scan is performed using a hand-held type for the parts that the fixed type cannot scan. However, a hand-held type is likely to have lower measurement accuracy due to shaking of the device in the operator’s hand. A fixed type is not only used to identify the overall shape, but must also be a 3D scanner that supports coordinates or GD&T, as well as cross-sectional measurement.
X-ray CT scanner
An X-ray CT scanner is a 3D scanner that is capable of measuring internal conditions in addition to the external shape. It uses the same measurement principle as a medical CT scanner, and is utilized for non-destructive inspections because it can inspect for cracks and air bubbles inside cast products or weld beads, the presence of foreign matter, and external dimensions. However, the application range is limited due to the high price of the machine.
Contact us to learn more about how our advanced technology can help take your business to the next level.
Contact Us
Utilizing 3 Data in Reverse Engineering
Based on 3D scanned measurement data, it is possible to create CAD data and perform simulation analysis. The 3D data also can be used for modeling with a 3D printer or creating data for processing by CAM.
Creating CAD data
CAD data can be created by preparing surface data from the measurement data and removing the data of unnecessary surfaces. This makes it possible to create 2D CAD or 3D CAD data for a product which has no drawings.

Surface data

CAD data
3D Printing or CAM
3D scans can be converted to mesh data in the form of an STL file, which is supported by most 3D CAD software and is commonly used for 3D printing.
Utilizing STL data for 3D printing allows for the quick creation of prototypes and replicas.

Measurement data

STL data

Simulation analysis
When CAD data is available, it can be used to simulate various evaluations such as flow analysis, heat resistance evaluation, and strength evaluation.
Evaluating and analyzing while changing the dimensions makes it possible to efficiently operate a PDCA cycle. It can also be used for preventing defects.
We’re here to provide you with more details.
Reach out today!

Improving Reverse Engineering Efficiency with the VL Series 3D Scanner CMM
With reverse engineering, it is necessary to measure every part of the entire product shape, and this requires high-precision and speedy operation. In addition to the entire shape, it must be possible to measure coordinates or GD&T, cross-sectional shapes, and other information from the acquired data.
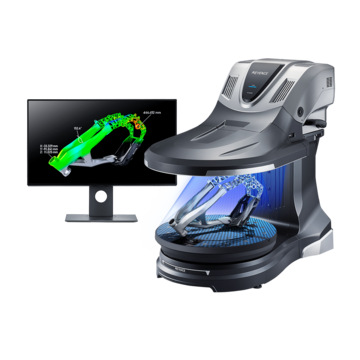
To address these measurement needs, KEYENCE has developed the VL Series 3D Scanner CMM. The VL Series accurately captures the 3D shape of the entire target surface without contacting the target. This allows instantaneous quantitative measurement that is free of variation in the measurement results. Some specific examples of the advantages are explained below.

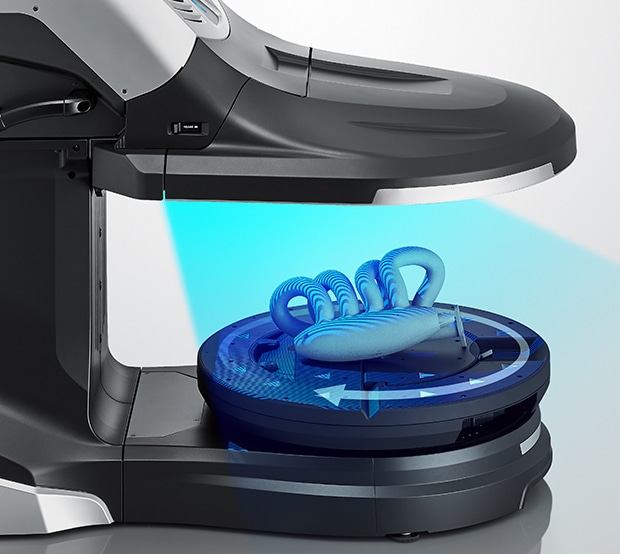
The stage can be rotated under the light, enabling the sample to be scanned from all directions
Advantage 1: Full 360° Measurement.
The VL Series capture 360° 3D data around the part, so even freeform geometries and complex shapes can be measured. No positioning or leveling is required, and high-accuracy measurement can be performed quickly even by someone without knowledge of or experience with measuring instruments.
Up to 16 million data points can be captured in a single, ensuring that the true shape of the part can be accurately reproduced.
Advantage 2: Analyze cross-sections at target points in detail
Precision non-destructive measurement and analysis are possible, even for cross-sections that were difficult to measure before. Reference planes can be set as needed in the 3D shape data and cross-section measurement can be performed from every direction. The data obtained from cross-sectional measurement can be converted to DXF data. As DXF data can be viewed using 2D CAD, this makes it possible to evaluate dimensions and create drawings through reverse engineering.
Discover how the VL Series 3D scanner revolutionizes quality control across industries, ensuring unmatched efficiency and reliability in your measurement processes. Request a demo today!
Cross-sectional measurement of a valve body

Discover more about this product.
Click here to book your demo.

Summary: Improved Reversed Engineering Capabilities
The VL Series enables high-speed 3D scanning to accurately create a 3D model of the target object for measurement.
- Because it acquires surface data, the entire target profile can be identified, and profile measurement can be performed at any location.
- No positioning is required. Measurement can be performed simply by placing the target on the stage and clicking a button.
- Non-contact, high accuracy shape measurement is possible even for soft targets such as rubber and flexible plastic.
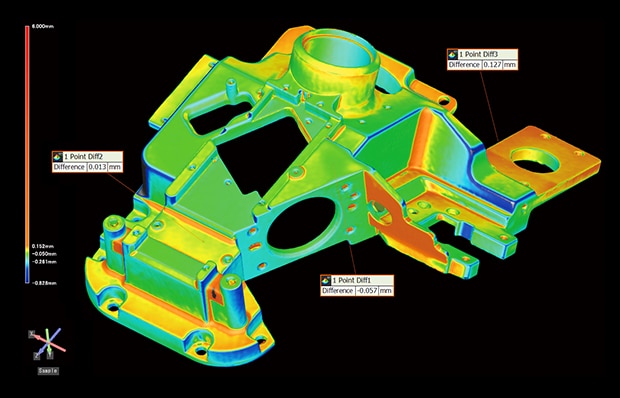
- The 3D shapes can be displayed in a color map. Being able to share data that is visually easy to understand allows comparisons of product shapes to be carried out smoothly.
- Multiple sets of measurement data can be easily and quantitively compared and analyzed.
The VL Series delivers dramatic improvements in reverse engineering, making it fast and easy to capture data, perform measurements, and compare the scanned data against CAD models.
Get detailed information on our products by downloading our catalog.
View Catalog


