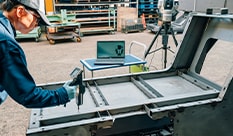
Dimensional Measurement of Counterweights, Frames, and Similar Parts of Heavy Equipment
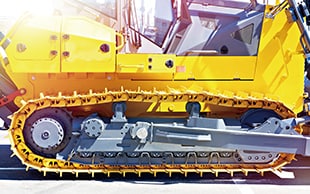
Commonly, crawlers, counterweights, frames, and similar heavy equipment components are cast, large-scale parts more than 1 m (3.3′) in size. It is difficult to measure these items with a bridge CMM or a similar installed measuring instrument. Therefore, these on-site dimensional measurements are most often performed with hand tools such as calipers and tape measures. However, such measurements generally require multiple workers, which makes them bothersome. Another problem is that these measurement tools cannot guarantee accurate three-dimensional shapes. Furthermore, recent years have seen ongoing reductions in costs and delivery times, which have led to demands for more efficient measurement methods.
There are a great many types of heavy equipment in the world, so we have selected the most general ones for discussion here. This section introduces basic knowledge such as the applications and structures of heavy equipment, the problems of their shape and dimensional measurements that affect their performance and durability, and methods for realizing measurements with better efficiency.
- What Is Heavy Equipment?
- Heavy Equipment Types and Structures
- Types of Heavy Equipment Parts
- Necessity of Dimensional Measurement of Heavy Equipment Parts
- Dimensional Measurement of Heavy Equipment Parts
- Problems of Dimensional Measurement of Heavy Equipment Parts and Their Solutions
- Optimization of Dimensional Measurement of Counterweights, Frames, and Similar Parts of Heavy Equipment
What Is Heavy Equipment?
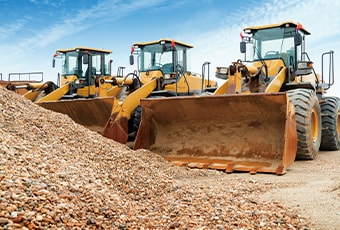
Heavy equipment is a generic name given to vehicles such as bulldozers, mobile cranes, excavators, and dump trucks used in applications such as engineering and construction work. Trailers used to transport heavy equipment and asphalt finishers that surface roads with asphalt are also covered by the term heavy equipment.
Construction equipment is an expression similar to heavy equipment. These days, these two terms are not used precisely for their intended meanings in a wide variety of media. However, strictly speaking, construction equipment includes fixed tower cranes, handheld concrete breakers, and similar tools together with vehicular heavy equipment.
Heavy Equipment Types and Structures
Because heavy equipment is used in diverse applications including cutting, pushing, digging, and scooping, there are many different types of these devices. Some examples of typical types of heavy equipment include bulldozers, mobile cranes, and excavators. This section introduces the structures of these devices.
Bulldozer
Bulldozers are the most popular type of heavy equipment. The body (tractor) is equipped with an attachment known as a blade. This attachment can be replaced to allow the bulldozer to work in a variety of applications. The back of the body is equipped with a claw-like shank called a ripper for breaking rocks and digging up hard ground. There are two types of travel devices: wheels (tires) and crawlers (caterpillars). Wheel types can run on paved roads, providing them with excellent mobility. On the other hand, crawler types have a large area of contact with the ground, which allows them to run on soft, uneven, or sloped surfaces. Also, the large pulling power of crawler types is the reason why they are mainly used in earthwork.
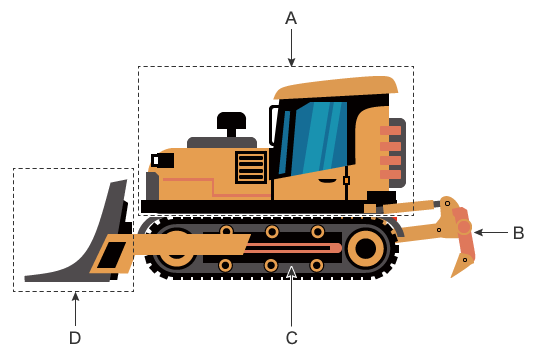
- A
- Body (tractor)
- B
- Ripper
- C
- Crawler (caterpillar)
- D
- Blade
Mobile crane
A mobile crane is a piece of heavy equipment whose self-propelled body is equipped with a long arm known as a boom. A rope passing through multiple movable pulleys and fixed pulleys hangs from the boom. The hook attached to the end of this rope catches on a load to transport it. Truss booms and telescopic booms (in which the boom expands and contracts) are available. Furthermore, to prevent heavy loads from overturning when hanging from a crane, some types are equipped with a counterweight at the back of the body, some types are equipped with stabilizing legs known as outriggers on the bottom of the body, and some types are equipped with both of these features.
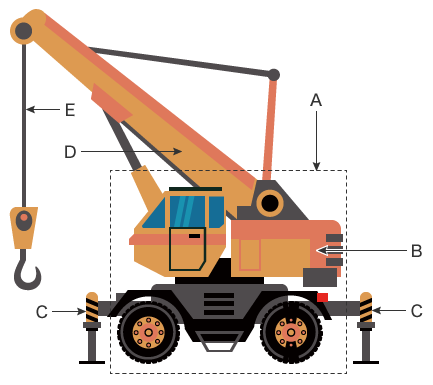
- A
- Body
- B
- Counterweight
- C
- Outrigger
- D
- Boom
- E
- Rope
Excavator
Excavators are heavy equipment used for many purposes including mining and loading earth and rocks and leveling the ground. An excavator comprises an upper swing body equipped with the engine, cab, and hydraulic control units; a work device unit equipped with the boom, arm, bucket, and similar features; and a lower travel body equipped with a crawler or other travel device. They are classified as standard, short rear swing, and ultra-short swing excavators according to the size of the part that sticks out from the lower travel body when the upper swing body rotates. Standard excavators can have large spaces for their engines and buckets, providing them with advanced excavation capability. On the other hand, short rear swing and ultra-short swing excavators are suited to work in narrow locations.
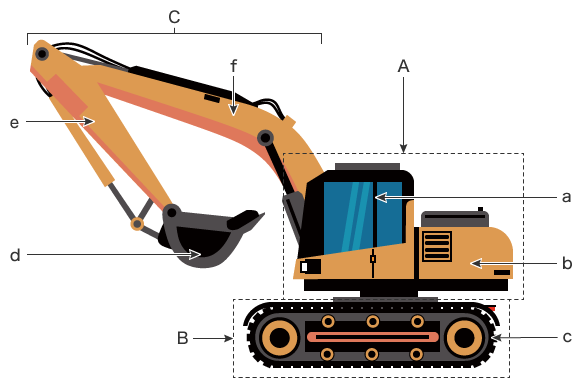
- A
- Upper swing body (a: cab, b: counterweight)
- B
- Lower travel body (c: crawler)
- C
- Work device unit (d: bucket, e: arm, f: boom)
Types of Heavy Equipment Parts
There is a great variety of heavy equipment with examples including bulldozers, mobile cranes, and excavators. The parts of these devices are also diverse. This section introduces the parts that are commonly used on heavy equipment.
Frame
Frame is the term used to indicate the skeletal structure of a piece of heavy equipment. A frame is made by welding together multiple parts created via casting or pressing. For excavators and other such heavy equipment whose upper part swings, the upper swing body has a revolving frame (upper frame), the lower travel body has a track frame (lower frame), and there is a swing frame between them. The arm also has a frame, and the optimal type is selected according to factors such as base material strength, plate thickness, and groove shape of welded joints.
Counterweight
The counterweight is attached to the back of the body to improve equipment stability during work. With some counterweights, weight can be added depending on the work. There are rated loads such as A performance and B performance according to the combination of the weight of the counterweight and the overhang width of the outriggers.
Kingpin/coupler
The towing connector is called the kingpin. The towed connector is called the coupler. For example, if a truck tows a semi-trailer, the connector on the truck is the kingpin, and the connector on the semi-trailer is the coupler.
The length of a semi-trailer in a license application is the length from the center of the kingpin to the end of the semi-trailer.
Necessity of Dimensional Measurement of Heavy Equipment Parts
Because most heavy equipment parts require strength and durability to allow them to absorb powerful impacts and twisting, a large amount of planning goes into not just their materials but their structures as well.
For example, rolled steel for welded structures such as HT570/780/980 is used for the frame material and the plate thickness is in excess of 30 mm (1.1811″) in the thick locations. Hydraulic shovels often use 400 to 490 MPa class steel material (SS, SM, etc.) suitable for welding with cast steel or cast and forged steel used in the attachment joints, hydraulic cylinder connectors, and similar locations.
Gas shielded arc welding is used to prevent frame defects such as cold cracking and spatter. Also, a material corresponding to HT570 is commonly selected in relation to the base material HT780 for the boom and similar parts. Also, recent years have seen attempts at manufacturing with new materials and welding methods such as by applying low-PCM steel (which does not easily undergo cold cracking) and using hybrid laser-arc welding (HLAW; which performs arc welding and laser welding at the same time).
As outlined here, the best methods for everything from material selection to welding and machining are used to manufacture heavy equipment parts. The reason for this is because the dimensional accuracy of heavy equipment parts greatly affects the performance and safety of heavy equipment. Hence, we can say that dimensional measurement is a vital inspection for these parts.
Dimensional Measurement of Heavy Equipment Parts
This section explains dimensional measurement points of heavy equipment parts.
Dimensional measurement points
Heavy equipment parts have strict dimensional accuracy requirements, but the important measurement points vary depending on the part. This section introduces the measurement points using as examples counterweights and frames (the heavy equipment parts that greatly affect performance and safety) as well as the assembly of parts.
Counterweight
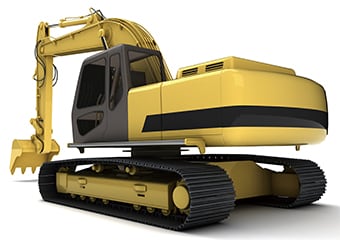
Counterweights are manufactured through casting followed by detailed cutting. In large-scale heavy equipment, most of the weight of the upper swing body is the counterweight. For example, a crane that weighs 200 tons or more can carry a counterweight of up to 74 tons.
If the counterweight also functions as the engine cover, dimensional accuracy is also important, so it is necessary to measure items such as the dimensions of each part after casting, the machining allowance before additional machining, and the dimensions and flatness after additional machining.
Frame
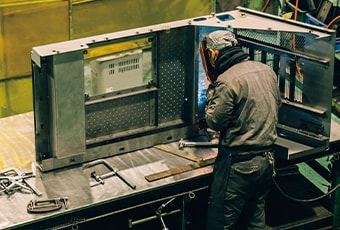
The dimensional accuracy of the revolving frame (upper frame), track frame (lower frame), and swing frame of a piece of heavy equipment greatly affects the swinging of the upper swing body and the travel function of the lower travel body. If strain is present in these frames, the upper swing body will not rotate normally, which will not only reduce the durability but may also lead to serious issues such as rotation accuracy and travel performance defects. Therefore, the dimensional measurement of all the parts that make up a frame as well as dimensional measurement after assembly are vital inspections.
Dimensions and assembly of parts
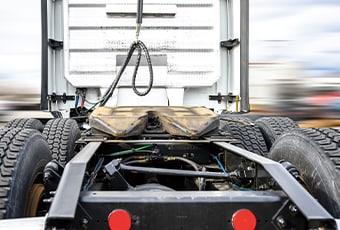
For frames such as semi-trailers, it is important to measure the positions of connectors such as the kingpin and the coupler. The weight that a truck can tow is calculated from the rear-wheel axle and the wheelbases of the kingpin and coupler. The load applied to the kingpin is referred to as fifth wheel load. The fifth wheel load is also listed on the automobile inspection certificate and indicates the maximum carrying capacity, so it must be measured accurately. Furthermore, the length of a vehicle (semi-trailer) in a license application is the length from the center of the kingpin to the end of the vehicle (semi-trailer), so this length is another important measurement point.
Problems of Dimensional Measurement of Heavy Equipment Parts and Their Solutions
It is important to confirm not only the dimensional accuracy of a finished piece of heavy equipment but also the machining accuracy during its manufacturing and the installation accuracy during its part replacement. Conventionally, these measurements are performed using hand tools such as dial gauges, tape measures, and calipers. Many component parts are large, inevitably requiring two to three people to measure each of them. There are also problems with variations in measured values from measurer to measurer, difficulty to understand strain tendencies, and long measurement time.
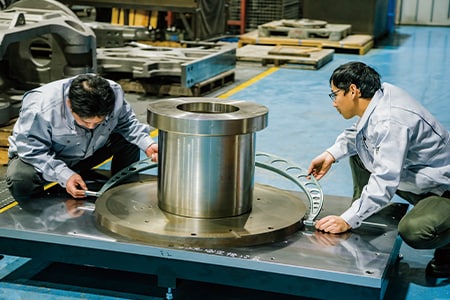
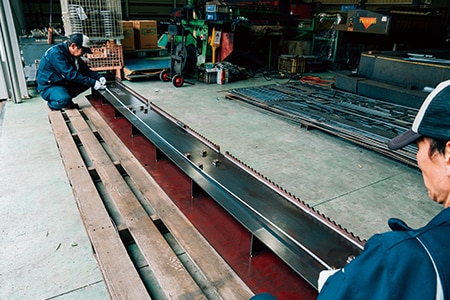
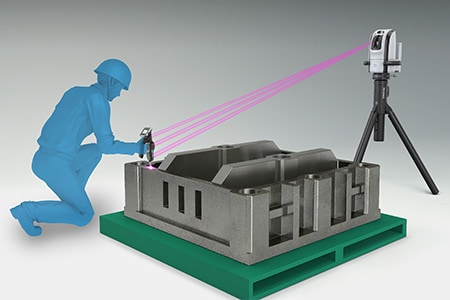
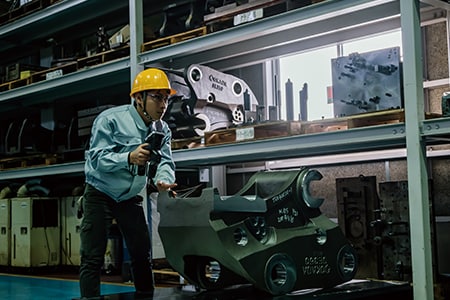
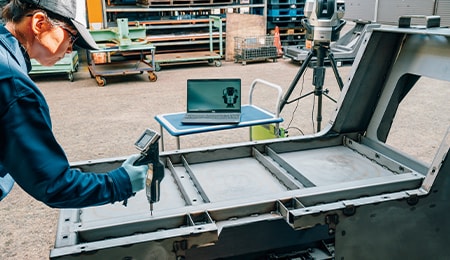
To solve these problems, the latest CMMs are used in an increasing number of cases. KEYENCE’s Wide Area Coordinate Measuring Machine WM Series enables high-accuracy dimensional measurement of large heavy equipment with the wireless probe. Even recessed areas of workpieces can be reached with no movement restrictions within the measurement range, which allows for easy single-person measurement with the simple operation of touching targets with the probe. Unlike measurements using measuring instruments such as dial gauges, tape measures, and calipers, results do not vary, enabling quantitative measurement. Three-dimensional dimensions, GD&T, and similar items can also be measured with accuracy. This enables operators to measure important dimensions, which were measured using conventional measuring instruments, while intuitively checking measurement points on the monitor.
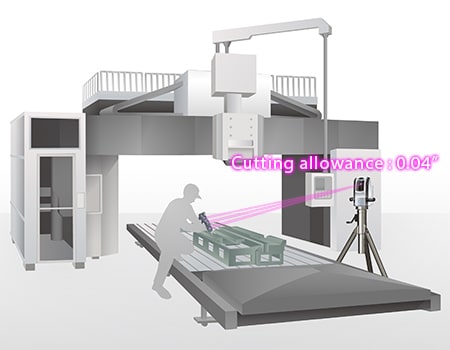
In-machine machining allowance measurement of cast parts
After they are cast, counterweights—the typical cast part of heavy equipment—are finished through additional machining with an instrument such as a five-face milling machine. During this process, the machining allowance before additional machining and the dimensions after additional machining are important and are conventionally measured with a bridge CMM or hand tools such as calipers and tape measures.
However, measuring a large-scale cast part with a bridge CMM requires the difficult work of removing the part from the machine tool and moving the part to the metrology lab. Also, bridge and arm CMMs have limitations on the size of what they can measure, making it impossible for them to measure large-scale products produced by plate working. Even when performing measurements with other methods, measurements performed with hand tools or the in-machine measurement function on the machine tool take an extremely long time, which decreases the operating rate of the machine tool. This is a problem.
Additionally, when these parts undergo additional machining while the final accuracy is checked, it is preferable to measure their dimensions on machine tools instead of removing them. Therefore, for dimensional measurement of cast parts, it can be said that the use of a CMM that is compact, portable, and capable of measuring a large area of a cast part set on a machine tool is ideal.
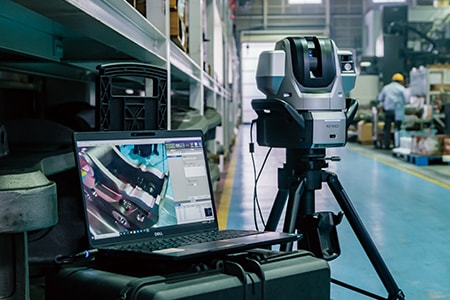
The WM Series can even measure cast parts without having to remove them from large-scale five-face milling machines. Its portable specifications allow the camera unit to be placed on a tripod anywhere, allowing for not only in-machine measurement but also measurement of large-scale products placed on the worksite floor. It enables easy single-person measurement of items such as the flatness of finished surfaces, increasing the efficiency of additional machining performed at the end of the manufacturing process. Additionally, deviations from designed tolerances can be judged instantaneously.
Frame strain measurement
Generally, a heavy equipment frame comprises multiple parts that are welded together. After it is assembled, a frame is machined with a bridge machining center to achieve necessary accuracy.
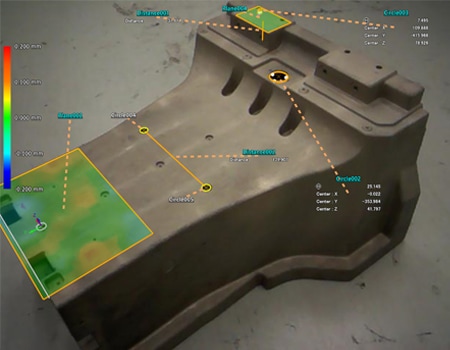
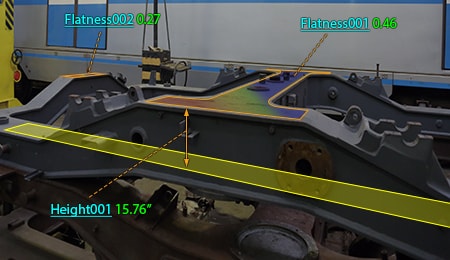
To obtain frame flatness, at least three points are measured on a target plane using tape measures or calipers and the maximum deviation is calculated as flatness. Alternatively, gaps generated when a target plane is placed between two parallel planes are measured using measuring instruments, such as feeler gauges, and OK/NG judgment is performed. However, it is impossible to accurately measure and quantify the flatness of 3D shapes, such as warpage and curvature. Laser trackers, CMMs specialized for large-scale products, may also be used but require time for preheating before measurement and have reflector optical-axis alignment that is difficult for a single worker to carry out. It is not the case that these instruments can be used easily by everyone.
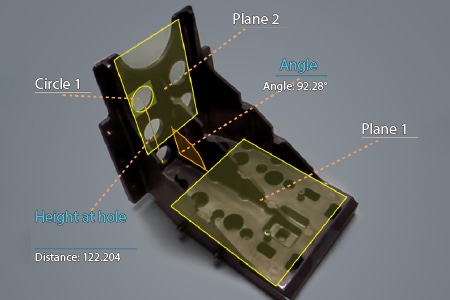
The WM Series enables accurate flatness measurement by simply touching a target plane with the wireless probe. Comparison measurements are possible between a part being measured and a shape imported from a 3D CAD file. It also visualizes strain and curvature of an entire surface in a color map, significantly improving efficiency of work that processes targets into intended shapes to complete them.
Dimensional and assembly accuracy measurement of each part from the kingpin
The accuracy of the assembly angle and position of a kingpin assembled on a large-scale frame is measured with the wheelbase of the rear wheel. For a large-scale ssemi-trailer, the wheelbase is several meters in size, so it is measured with several workers using leveling string or a similar tool. The angle is measured using a level or a similar measuring instrument. However, measured values vary according to the angle and strength used to apply these hand tools to the target, which causes variations in measured values among operators.
With the WM Series, it is possible for a single person to perform quantitative measurement by simply touching measurement points with the probe. Simply by touching the target with the probe, the operator can measure not just the distortion and strain caused by welding but the kingpin installation angle as well. Even 3D position coordinates can be measured. Various other elements—such as perpendicularity, position, and parallelism—can also be measured. The WM Series greatly contributes to a higher quality of manufacturing of frames.
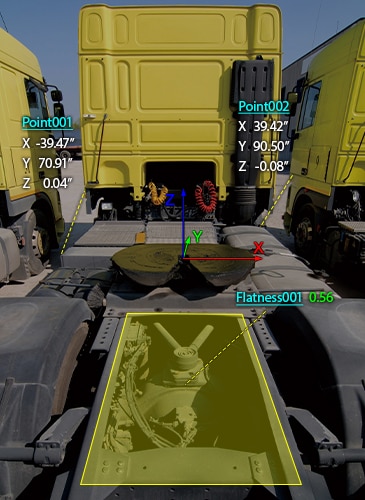
Optimization of Dimensional Measurement of Counterweights, Frames, and Similar Parts of Heavy Equipment
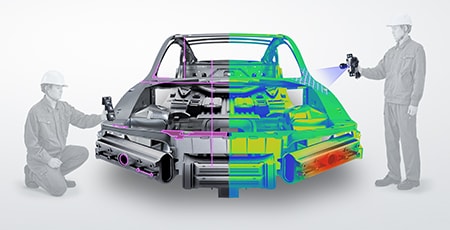
The WM Series enables single-person measurement of the shapes and dimensions of heavy equipment parts with the simple operation of touching targets with the wireless probe. In addition to the features introduced above, the WM Series has the following advantages.
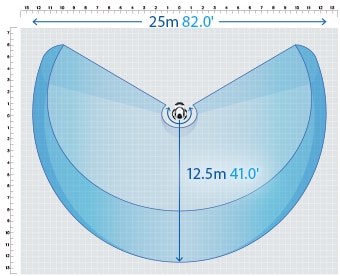
- High-accuracy measurement over a large area
- A wide measurement range up to 25 m (82.0'′) can be measured with high accuracy. The WM Series is equipped with the navigation measurement mode, which enables measurement at the same point according to a memorized measurement procedure, allowing anyone to obtain the same measurement data.
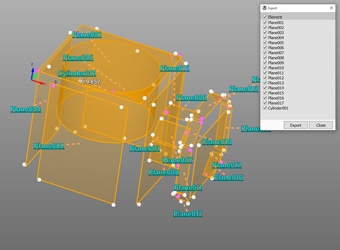
- Measurement results can be output as 3D models
- The measured elements can be exported as a STEP/IGES file. 3D CAD data can be created on the basis of the measurement results of an actual product even if no drawing is available.
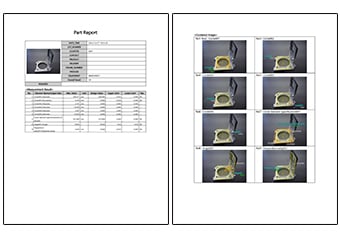
- Inspection reports can be created with photos
- Inspection reports can be automatically created with photos that allow you to understand measurement points at a glance. These inspection reports can not only gain you the trust of your business partners but also allow you to save measurement results as digital data, leading to higher efficiency of in-house data management.
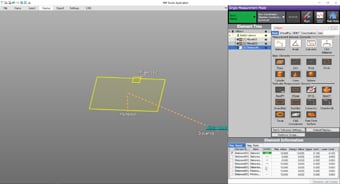
- Easy-to-understand interface
- CMM interfaces are often a mess of complex and unfamiliar commands. The WM Series provides intuitive operation using images and icons, so anyone can easily understand how to operate the system.
The WM Series strongly supports analysis, such as comparison with 3D CAD data, as well as measurement of the dimensions and shapes of the parts of heavy equipment. It dramatically improves the efficiency of manufacturing of heavy equipment parts and of work indispensable for their installation and quality management.


