Digital Microscopes
Observation and Measurement of Heat-treated Metal Using Digital Microscopes
Typical metalworking processes include cutting, polishing, and pressing. Heat treatment is another important metalworking process. Heat treatment alters various properties of materials, such as strength, hardness, tenacity, wear resistance, and corrosion resistance.

This section explains the basics of heat treatment of metal along with examples of how it can be observed and measured using digital microscopes.
What is Heat Treatment?
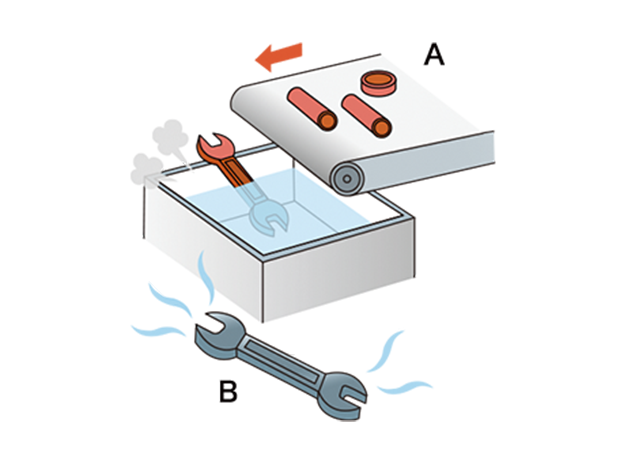
A : Heating (until metal turns red)
B : Cooling (until heated metal turns black)
Heat treatment is specified by the Japan Metal Heat Treatment Association as a process of heating metal until it turns red and then cooling it. It is described as a metalworking technique that improves properties by heating and cooling metal materials without changing their shapes. Heat treatment is a metalworking process, like cutting and plastic forming, and the properties to be modified include strength, hardness, tenacity, shock resistance, wear resistance, corrosion resistance, machining properties, and cold workability.
Typical Heat Treatment Methods
- Quenching
This heat treatment method hardens steels. Typical steels turn red when heated to approximately 700°C (1292°F) and their crystal structures and properties start to change. This property change is called transformation and the temperature at which the change starts is called the transformation temperature.Quenching is a heat treatment method that changes iron crystals to austenite, where a large amount of carbon is dissolved (solid solution) at temperatures exceeding the transformation temperature, and then cools them rapidly using water or oil to change them to very hard crystals called martensite. - Annealing
This heat treatment adjusts the grain size of steel and softens it. Metal is heated to a temperature approximately 50°C (122°F) above its transformation temperature. After the metal is held at this temperature for approximately one hour, it is cooled slowly in the furnace.
This treatment is performed to make cutting easier during product metalworking. - Normalizing
This heat treatment modifies uneven steel structures to make them suitable for cutting and pressing. Crystal grains become smaller and stronger when heated to a temperature approximately 50°C (122°F) above the transformation temperature and then cooled in air. - Tempering
This heat treatment reduces the hardness of quenched or normalized steels and increases their tenacity. Steels are heated to approximately 500°C (932°F) and then cooled. This process makes steels harder and more resilient. Tempering is a heat treatment that restores tenacity (toughness) by returning the structure from martensite to one in which fine ferrite and cementite have precipitated.
Principles of Quenching and Tempering
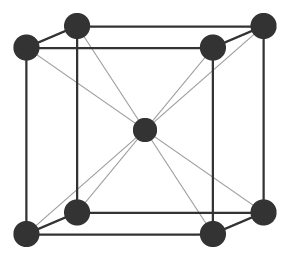
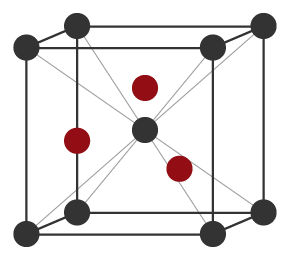
Room temperature iron takes the form of a body-centered cubic lattice where atoms are located at each vertex and at the center of the cube.
After quenching, the iron takes the form of a face-centered cubic lattice where atoms are located at each vertex and the centers of the faces of the cube, and the carbon melts into this form.
With rapid cooling, iron attempts to return to a body-centered cubic lattice structure. However, because carbon is already taken in, the structure becomes misshapen and hardens.
Body-centered cubic lattice
Face-centered cubic lattice (Quenching)
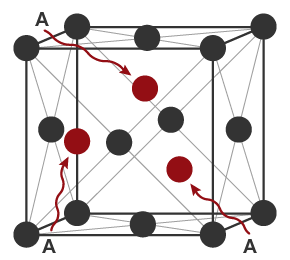
A : Carbon
Body-centered cubic lattice (Tempering)
Heat-treated Metal Observation and Measurement Examples Using Digital Microscopes
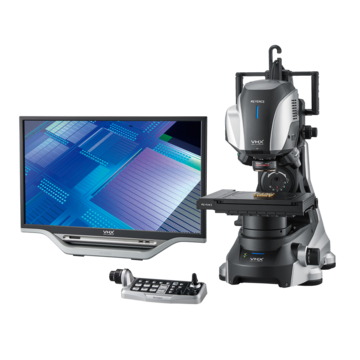
These are the latest examples of observation and measurement of heat-treated metal using KEYENCE’s VHX Series 4K Digital Microscope.
Vickers hardness—a hardness scale—can be calculated by pushing a rhombic diamond indenter onto the target material and measuring the length of the diagonal line of the Vickers dent created.
3D measurement of a Vickers dent
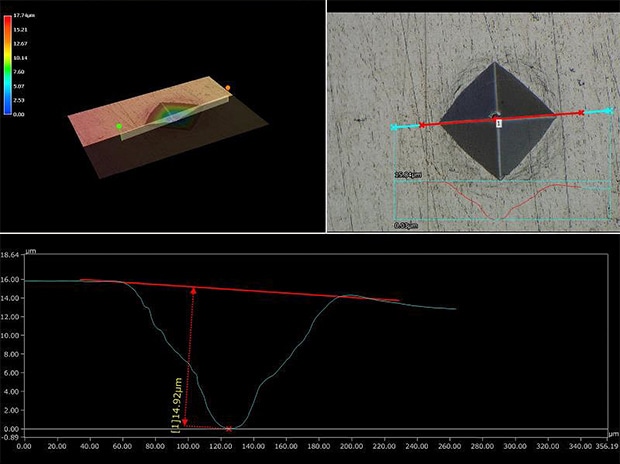
1000×, coaxial illumination
2D measurement of a Vickers dent
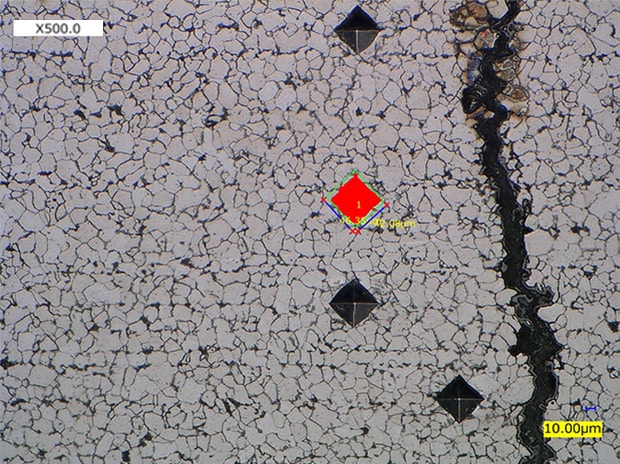
500×, coaxial illumination
Decarburized layer depth measurement
Heating or rolling steel materials will generate a decarburized layer on the steel surface. It is necessary to measure the depth of this decarburized layer because it affects the quality of steel materials.
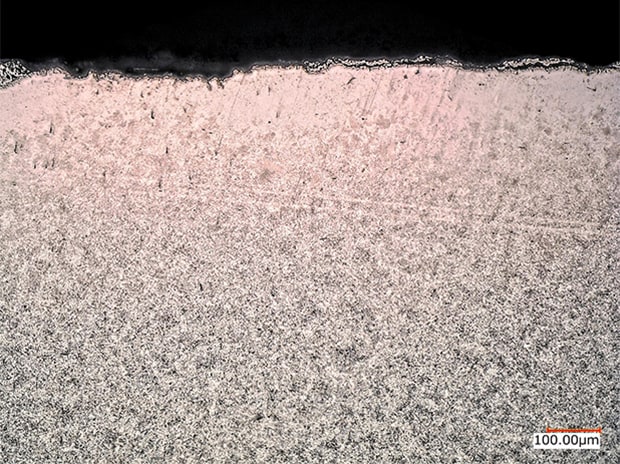
300×, coaxial illumination, before measurement
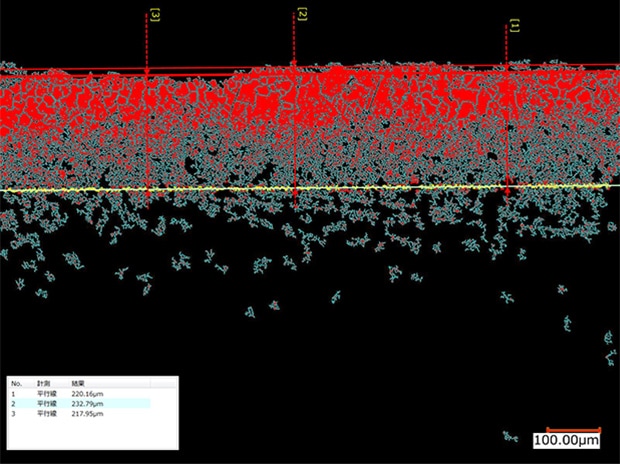
300×, coaxial illumination, after measurement
Grain size analysis
The grain size number of a heat-treated metal structure can be automatically calculated according to industrial standards such as JIS G 0551 and ASTM E1382.
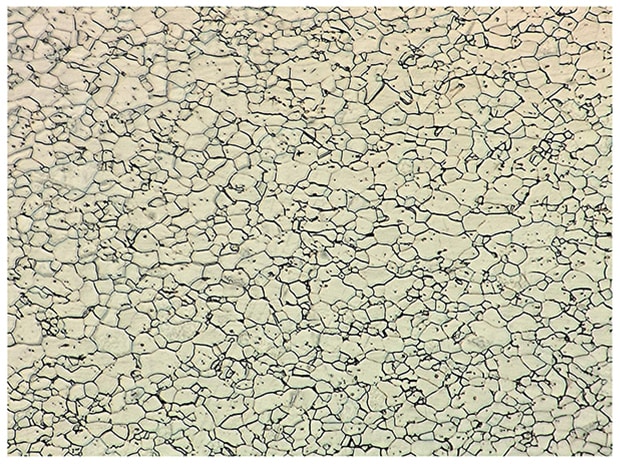
1500×, coaxial illumination, before measurement
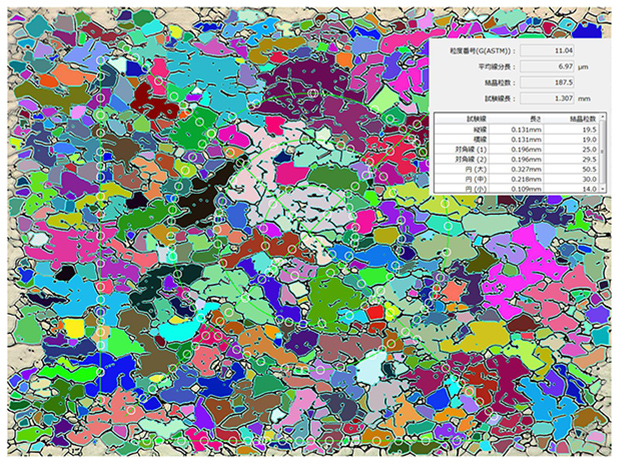
1500×, coaxial illumination, after measurement
Observation of a heat-treated interface
Heat-treated interfaces can be clearly observed with surface textures emphasized using the HDR function.
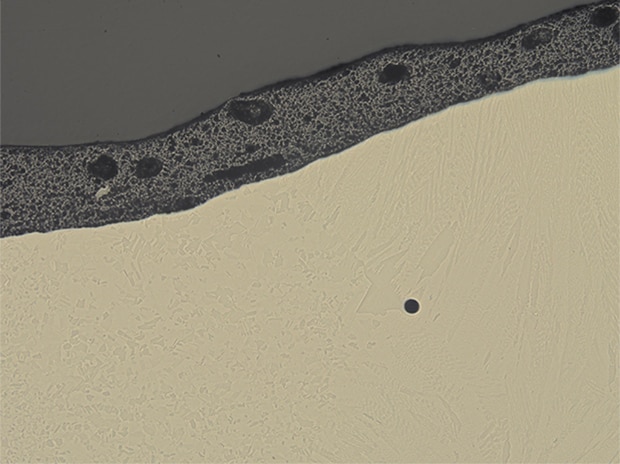
40×, coaxial illumination, normal image
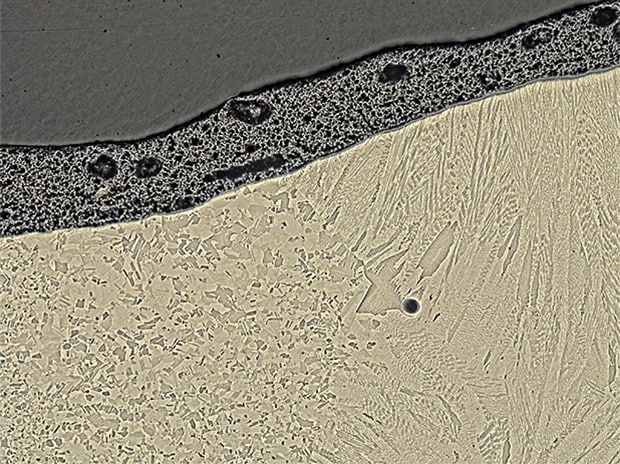
40×, coaxial illumination, HDR image


